Z88DK を使って MSX のゲームをつくるための環境構築メモ
はじめに
この文書は、Z80 を CPU に持つコンピュータ向けの C コンパイラ・アセンブラツールチェーンである Z88DK を使って MSX のゲームをつくるための環境構築メモです。
The development kit for over a hundred z80 family machines - c compiler, assembler, linker, libraries.
手順では Ubuntu 24.04 LTS を用いています。Z88DK の準備については Windows WSL2 でも同様の手順です。
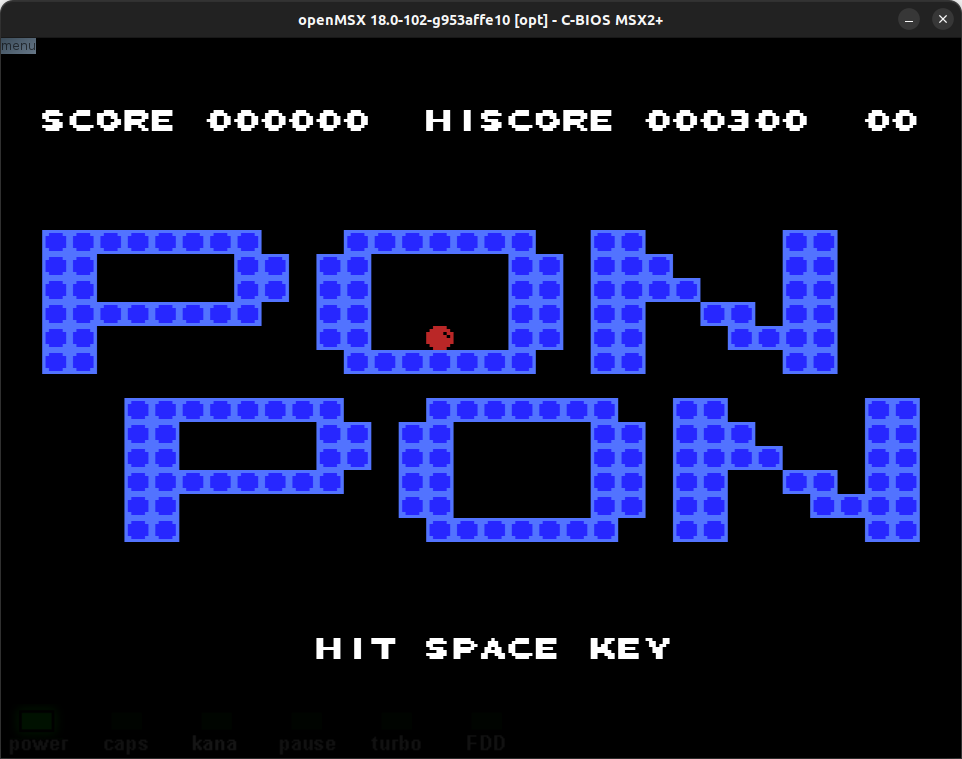
Z88DK で実装したゲーム
筆者が Z88DK で実装した MSX ゲームです。GitHub からソースコードも見ることができます。
PONPON
🔗 https://github.com/h1romas4/z88dk-msx-template
NOBORUNOCA
🔗 https://github.com/h1romas4/noborunoca
Z88DK ツールチェイン
Z88DK のビルド
Z88DK の v2.4 を使うためソースコードからビルドします。
依存関係の導入(Z88DK の Github Actions build-on-ubuntu.yml を参考にしてください)
sudo apt install build-essential bison flex libxml2-dev zlib1g-dev m4 ragel re2c dos2unix texinfo texi2html gdb curl perl cpanminus ccache libboost-all-dev libmodern-perl-perl libyaml-perl liblocal-lib-perl libcapture-tiny-perl libpath-tiny-perl libtext-table-perl libdata-hexdump-perl libregexp-common-perl libclone-perl libfile-slurp-perl pkg-config libgmp3-dev
Perl の依存関係をローカルホーム(~/.perl5)に導入
cpanm --local-lib=~/perl5 App::Prove CPU::Z80::Assembler Data::Dump Data::HexDump File::Path List::Uniq Modern::Perl Object::Tiny::RW Regexp::Common Test::Harness Text::Diff Text::Table YAML::Tiny
ビルド前に Perl のライブラリーパスを設定
eval $(perl -I ~/perl5/lib/perl5/ -Mlocal::lib)
ビルド(submodule を使っているので --recursive を必ずつける)
git clone --recursive https://github.com/z88dk/z88dk.git
cd z88dk
git checkout v2.4
git submodule update --init --recursive
./build.sh
ビルド確認(zcc がコンパイラフロントエンドコマンドになります)
$ ls -laF bin/
合計 85628
drwxrwxr-x  2 hiromasa hiromasa     4096 12月 22 20:36 ./
drwxrwxr-x 18 hiromasa hiromasa     4096 12月 24 15:12 ../
-rwxr-xr-x  1 hiromasa hiromasa 26791712 12月 22 20:29 z80asm*
-rwxr-xr-x  1 hiromasa hiromasa  1546984 12月 22 20:27 z88dk-appmake*
-rwxr-xr-x  1 hiromasa hiromasa    15664 12月 22 20:29 z88dk-asmpp*
-rwxr-xr-x  1 hiromasa hiromasa     6793 12月 22 20:29 z88dk-asmstyle*
-rwxr-xr-x  1 hiromasa hiromasa   264960 12月 22 20:29 z88dk-basck*
-rwxr-xr-x  1 hiromasa hiromasa   206536 12月 22 20:27 z88dk-copt*
-rwxr-xr-x  1 hiromasa hiromasa   577952 12月 22 20:29 z88dk-dis*
-rwxr-xr-x  1 hiromasa hiromasa    28272 12月 22 20:29 z88dk-dzx0*
-rwxr-xr-x  1 hiromasa hiromasa    17192 12月 22 20:29 z88dk-dzx7*
-rwxr-xr-x  1 hiromasa hiromasa    35864 12月 22 20:29 z88dk-font2pv1000*
-rwxr-xr-x  1 hiromasa hiromasa  1213384 12月 22 20:29 z88dk-gdb*
-rwxr-xr-x  1 hiromasa hiromasa    47408 12月 22 20:29 z88dk-lib*
-rwxr-xr-x  1 hiromasa hiromasa   893344 12月 22 20:27 z88dk-sccz80*
-rwxr-xr-x  1 hiromasa hiromasa  1809984 12月 22 20:29 z88dk-ticks*
-rwxr-xr-x  1 hiromasa hiromasa   318472 12月 22 20:27 z88dk-ucpp*
-rwxr-xr-x  1 hiromasa hiromasa 26791712 12月 22 20:29 z88dk-z80asm*
-rwxr-xr-x  1 hiromasa hiromasa   436904 12月 22 20:29 z88dk-z80nm*
-rwxr-xr-x  1 hiromasa hiromasa   101896 12月 22 20:29 z88dk-z80svg*
-rwxr-xr-x  1 hiromasa hiromasa   459360 12月 22 20:29 z88dk-zobjcopy*
-rwxr-xr-x  1 hiromasa hiromasa    46104 12月 22 20:29 z88dk-zpragma*
-rwxrwxr-x  1 hiromasa hiromasa 25538288 12月 22 20:36 z88dk-zsdcc*
-rwxr-xr-x  1 hiromasa hiromasa    48496 12月 22 20:29 z88dk-zx0*
-rwxr-xr-x  1 hiromasa hiromasa    21456 12月 22 20:29 z88dk-zx7*
-rwxr-xr-x  1 hiromasa hiromasa   398288 12月 22 20:29 zcc*
Z88DK の設定
ZCCCFG 環境変数を z88dk/lib/config に設定して、PATH を z88dk/bin に通します。 また、この後 VS Code のソース編集時に include path を通すため Z88DK_HOME (任意の名前)を設定しておきます。
.bashrc の再下部に追加
# z88dk
export Z88DK_HOME=/home/hiromasa/devel/msx/z88dk
export ZCCCFG=${Z88DK_HOME}/lib/config
export PATH=${Z88DK_HOME}/bin:${PATH}
zcc の起動確認
$ zcc +msx
zcc - Frontend for the z88dk Cross-C Compiler - v23854-4d530b6eb7-20251222

Usage: zcc +[target] {options} {files}

Options:

   -v -verbose                  Output all commands that are run (-vn suppresses)
   -h -help                     Display this text
      -o                        Set the basename for linker output files
      -specs                    Print out compiler specs
# ..snip..
Z88DK のコアやライブラリーソースなどを VS Code で開いて参照する場合は、ビルド後に多数生成される .o オブジェクトファイルで VS Code が遅くならないよう .vscode/settings.json を追加し以下の files.watcherExclude 設定をすると良いです。
.vscode/settings.json
{
    "files.watcherExclude": {
        "**/.git/objects/**": true,
        "**/.git/subtree-cache/**": true,
        "**/obj/**": true,
    }
}
テンプレートプロジェクト
テンプレートプロジェクトの clone
導入したツールチェーンの動作を確認するため、筆者がつくったサンプルプログラムをセットしたテンプレートプロジェクトを git clone します。
- cmake によるビルドが組まれています。
- ソースコード編集やビルドに必要な VS Code の設定が入っています。
- サンプルソースと
.git/を削除して、自分のプログラムを入れるとそのままプロジェクトディレクトリとして使えると思います。 - GitHub Actions による自動ビルドが組まれています。タグを push すると
.romを GitHub のコンテナでビルドしてリリースできます。
Z88DK MSX build template with sample game
Use this template
cmake の導入
apt install cmake
テンプレートプロジェクトのビルドをしてみます。
git clone https://github.com/h1romas4/z88dk-msx-template.git
cd z88dk-msx-template
cmake -S . -B build
cmake --build build
この操作で src/msx 配下のサンプルプログラムがコンパイルされ、dist/ 配下に MSX で起動可能な .rom ファイルが生成されます。(任意の MSX エミュレータにセットすることで起動可能です)
$ ls -laF dist/
合計 152
drwxrwxr-x  2 hiromasa hiromasa   4096 12月 27 14:19 ./
drwxrwxr-x 11 hiromasa hiromasa   4096 12月 27 14:18 ../
-rw-rw-r--  1 hiromasa hiromasa 122410 12月 27 14:19 example.map
-rw-rw-r--  1 hiromasa hiromasa  16384 12月 27 14:19 example.rom
-rw-rw-r--  1 hiromasa hiromasa    264 12月 27 14:19 example_BSS.bin
-rw-rw-r--  1 hiromasa hiromasa     24 12月 27 14:19 example_DATA.bin
テンプレートプロジェクトの CMakeLists.txt の構成
プロジェクトのビルドは CMakeLists.txt に従って行われます。プロジェクトに合わせて修正します。
コンパイラのパス指定(${Z88DK_HOME} 環境変数を利用している)
set(CMAKE_C_COMPILER $ENV{Z88DK_HOME}/bin/zcc)
set(CMAKE_ASM_COMPILER $ENV{Z88DK_HOME}/bin/zcc)
dist/example.rom の出力 ROM 名の設定
project(example.rom C ASM)
ビルド対象ソースファイルの追加削除(.c 及び .asm に対応)
target_sources(${PROJECT_NAME} PRIVATE
    src/c/example.c
    src/asm/psgdriver.asm
    src/asm/define_music.asm
    src/asm/define_graphic.asm
)
CMakeLists.txt を修正した後は、一度 cmake をし直します。
# build ディレクトリごと削除
rm -Rf build
cmake -S . -B build
cmake --build build
通常のソースコード変更だけの場合は cmake --build build だけで OK です。なお、アセンブラで include を使っている場合、include 先の更新までは make が追従しませんので、更新がある場合はいったん make clean してください。
その他のコンパイルオプション
The frontend of z88dk is called zcc, it is this that you should call if you want to do any compilations. To invoke the frontend use the command:
リンカー向けオプション:
target_link_options(${PROJECT_NAME} PRIVATE
    +msx
    -create-app
    -subtype=rom
    -m
    -lm
    -lmsxbios
)
-mが後述のexample.mapシンボルマップファイルを出力する指定。-subtype=romで0x4000からの ROM 版をつくることを指定。- もし
0xc0000からの RAM 版をつくる場合は-subtype=default(.cas形式) もしくは-subtype=wav(カセットテープのピーガー形式) を指定。- 実機 BASIC の
BLOAD "CAS:",Rでロード・ランできる。
- 実機 BASIC の
cmake が生成した Makefile の zcc コマンドを確認する場合は build/compile_commands.json ファイルを確認すると良いでしょう。
また、GitHub Actions でビルドを構成しています。ここまでのコマンドの流れは .github/workflows/build-release.yml でも確認できますのでご参照ください。
VS Code
テンプレートプロジェクトは C/C++ for Visual Studio Code 拡張用の .vscode/settings.json を含んでいます。Z88DK への include path の設定がされているので、拡張を有効にした後、ディレクトリを VS Code で開くことで、ソースコード編集中の定義の参照やインテリセンスによる補完ができます。
The C/C++ extension adds language support for C/C++ to Visual Studio Code, including features such as IntelliSense and debugging.
.vscode/settings.json (${env:Z88DK_HOME} 環境変数で Z88DK へのパスをたどっている)
{
    "configurations": [
        {
            "name": "z88dk",
            "includePath": [
                "${workspaceFolder}/src/msx/*",
                "${env:Z88DK_HOME}/include/*",
                "${env:Z88DK_HOME}/include/**/*"
            ],
            "defines": [],
            "compilerPath": "${env:Z88DK_HOME}/bin/zcc",
            "cStandard": "c11",
            "intelliSenseMode": "gcc-x86"
        }
    ],
    "version": 4
}
また、.vscode/tasks.json で F1 キー押下後の Run Tasks メニューに、ビルド系のコマンドを追加しています。
.vscode/tasks.json
{
  // See https://go.microsoft.com/fwlink/?LinkId=733558
  // for the documentation about the tasks.json format
  "version": "2.0.0",
  "tasks": [
    {
      "label": "Clean CMake directory",
      "type": "shell",
      "linux": {
        "command": "rm -Rf ${workspaceFolder}/build",
      },
    },
    {
      "label": "Run CMake (make)",
      "type": "shell",
      "dependsOn": "Clean CMake directory",
      "linux": {
        "command": "cmake -S . -B build",
      },
    },
    {
      "label": "Clean Build (make)",
      "type": "shell",
      "linux": {
        "command": "make --build build --target clean",
      },
    },
    {
      "label": "Run Build (make)",
      "type": "shell",
      "dependsOn": "Clean Build (make)",
      "linux": {
        "command": "cmake --build build",
      },
    },
  ]
}
Z88DK v2.2 から v2.4 へアップグレードする場合
本手順の旧テンプレートリポジトリ(2025-12-24以前)では Z88DK v2.2 が使われていました。 Z88DK ツールチェインを v2.4 にアップグレードした場合、そのままの旧 CMakeLists.txt であるとコンパイラ・リンカーオプションが混乱してビルドできなくなるため、次のようにして CMakeLists.txt を新しいものにしてください。
- CMakeLists.txt で旧
CMakeLists.txtを置換する。 - プロジェクトルートの
cmakeディレクトリをrm -Rf cmake/のように削除。不要なマクロをリファクタしました。 - 以下の部分をプロジェクトに合わせて再設定。
プロジェクト(.rom)名:
project(example.rom LANGUAGES C ASM)
ソースコード設定:
target_sources(${PROJECT_NAME} PRIVATE
    src/c/example.c
    src/asm/psgdriver.asm
    src/asm/define_music.asm
    src/asm/define_graphic.asm
)
コンパイル・リンカーオプションで変更している部分があれば旧 CMakeLists.txt から移植(旧から比べてそれぞれ分割しました)
# Basic compile options
target_compile_options(${PROJECT_NAME} PRIVATE
    +msx
    -O2
    -vn
    #$<$<COMPILE_LANGUAGE:C>:-debug>
    $<$<COMPILE_LANGUAGE:ASM>:--list>
)

# Defines
target_compile_definitions(${PROJECT_NAME} PRIVATE
    # https://github.com/z88dk/z88dk/wiki/Classic-allocation#automatic-heap-configuration
    -DAMALLOC
)

# Linker options
target_link_options(${PROJECT_NAME} PRIVATE
    +msx
    -create-app
    -subtype=rom
    -m
    -lm
    -lmsxbios
)
旧から比べてビルドコマンドを短く使いやすいようにしました。次のようなコマンドで cmake - make するようにしてください。
# プロジェクトのルートにいること
$ pwd
/home/hiromasa/devel/msx/z88dk-msx-template
cmake -S . -B build # cmake
cmake --build build --target clean # make clean
cmake --build build # make
MSX のエミュレーション実行環境
openMSX のビルド
ビルドした .rom の動作確認を行うため openMSX をビルドします。(RELEASE_21_0 で確認)
the MSX emulator that aims for perfection
依存関係の導入
sudo apt-get install libgl1-mesa-dev
sudo apt-get install libsdl2-dev libpng-dev tcl-dev libglew-dev libsdl2-ttf-dev libvorbis-dev libtheora-dev libogg-dev libao-dev libfreetype6-dev
ビルド
git clone https://github.com/openMSX/openMSX.git
cd openMSX
git checkout RELEASE_21_0
make -j6 OPENMSX_TARGET_CPU=x86_64 OPENMSX_TARGET_OS=linux OPENMSX_FLAVOUR=opt

# ...snip...
Creating binary package:
  Executable...
  Data files...
  Documentation...
  C-BIOS...
  Creating symlinks...
-j6はコンパイルに使う CPU コア数。マシンに合わせて設定すると速くビルドできます。
インストール
derived/x86_64-linux-opt-3rd/bindist/install/bin に生成された openmsx をパスが通っている適当な場所にコピー。
cp -p derived/x86_64-linux-opt-3rd/bindist/install/bin/openmsx ~/.local/bin
~/.openMSX にコンフィグをコピー
mkdir ~/.openMSX
cp -Rfp derived/x86_64-linux-opt-3rd/bindist/install/share/ ~/.openMSX
起動確認(テンプレートプロジェクトの example.rom による)
$ cd /home/hiromasa/devel/msx/z88dk-msx-template/dist
$ ls -laF
合計 128
drwxrwxr-x  2 hiromasa hiromasa  4096  9月  9 23:26 ./
drwxrwxr-x 10 hiromasa hiromasa  4096  9月  9 18:04 ../
-rw-rw-r--  1 hiromasa hiromasa 94546  9月  9 17:02 example.map
-rw-rw-r--  1 hiromasa hiromasa 16384  9月  9 17:02 example.rom
-rw-rw-r--  1 hiromasa hiromasa   245  9月  9 17:02 example_BSS.bin
-rw-rw-r--  1 hiromasa hiromasa    16  9月  9 17:02 example_DATA.bin
$ openmsx example.rom
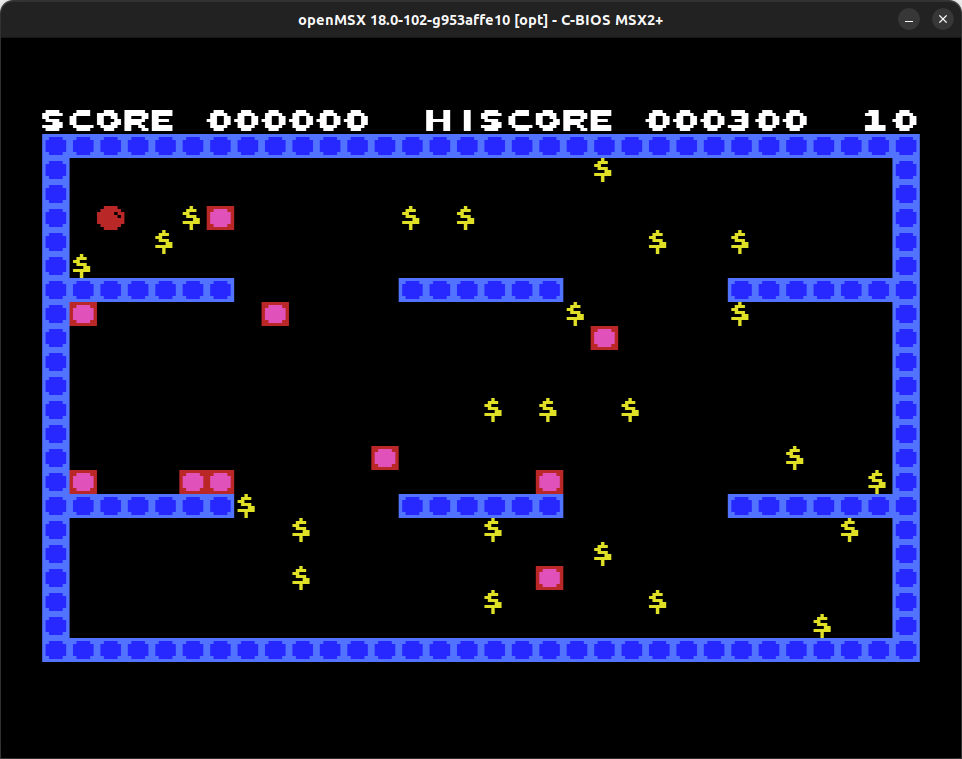
(2025-12) なお、テンプレートに含まれる example.rom は openMSX の VDP アクセスタイミングの精度向上により不具合があります。具体的にはおそらく VDP を連続でリードしている部分で読みぬけが起きていてボールがどこかに飛んでいきます。気が向いた時にでも修正します。
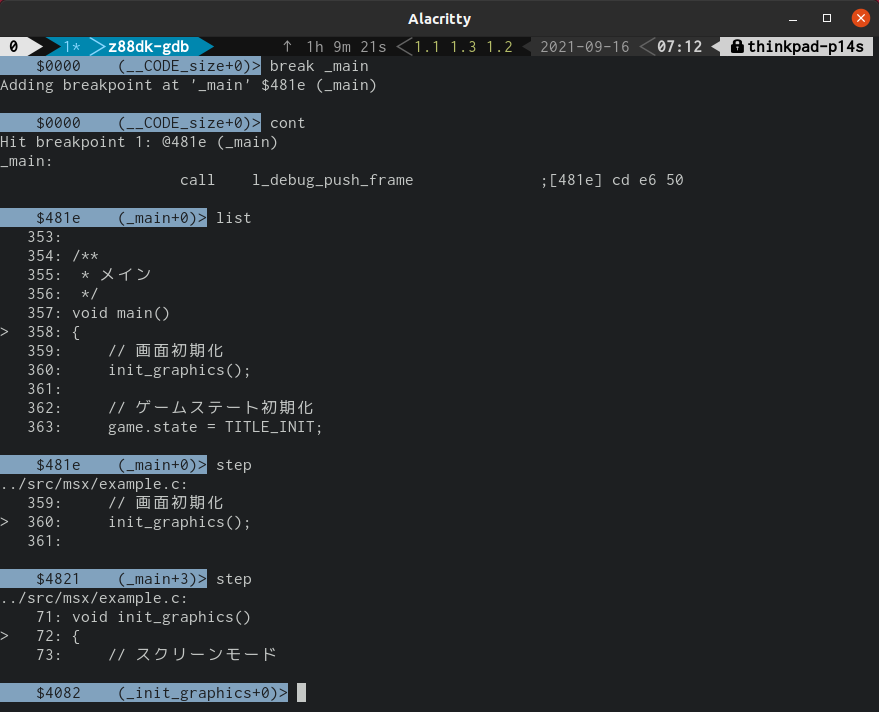
MAME と z88dk-gdb でデバッグを行う。
Z88DK には z88dk-gdb コマンドが含まれており、MAME の gdbstub と通信してデバッグを行うこともできます。
- MSX ゲーム開発を MAME/C-BIOS で行うメモ
- CMakeLists.txt の
CFLAGSで-m-debugコンパイルオプションを有効にしてビルドすると C のレベルでデバッグできます。(プログラムは遅くなります)- 2022/7 リリースの Z88DK v2.2 からの機能です。
$ (cd ${MAME_HOME} && ./cbios cbios example -window -resolution 800x600 -debugger gdbstub -debug)
gdbstub: listening on port 23946
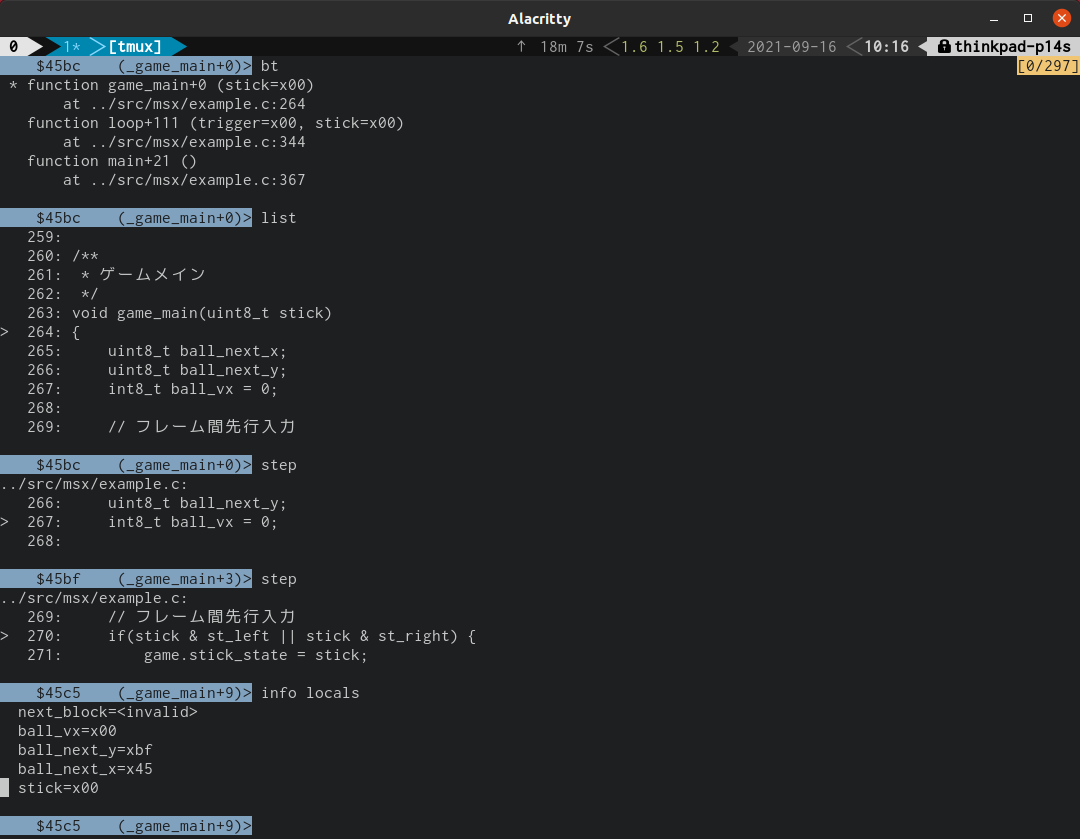
$ cd dist/ # .map ファイル内に出力されたソースコードのパス(../src/msx/example.c)と z88dk-gdb を起動するカレントディレクトリを合わせます。(v2.2 からソースマップがフルパスになったのでこの操作は不要)
$ z88dk-gdb -h 127.0.0.1 -p 23946 -x example.map
また、Native Debug 拡張を使い、gdb/mi2 に VS Code からアタッチすることで VS Code デバッガから操作することもできます。
.vscode/launch.json
{
    "version": "0.2.0",
    "configurations": [
        {
          "name": "Attach to MAME gdbserver",
          "type": "gdb",
          "request": "attach",
          "target": "127.0.0.1:23946",
          "remote": true,
          "cwd": "${workspaceRoot}",
          "gdbpath": "${env:Z88DK_HOME}/bin/z88dk-gdb",
          "debugger_args": [
            "-x",
            "${workspaceRoot}/dist/example.map" // or appropriate .map of your project (-m -debug needed!)
          ],
          "autorun": [
          ]
      }
    ]
}
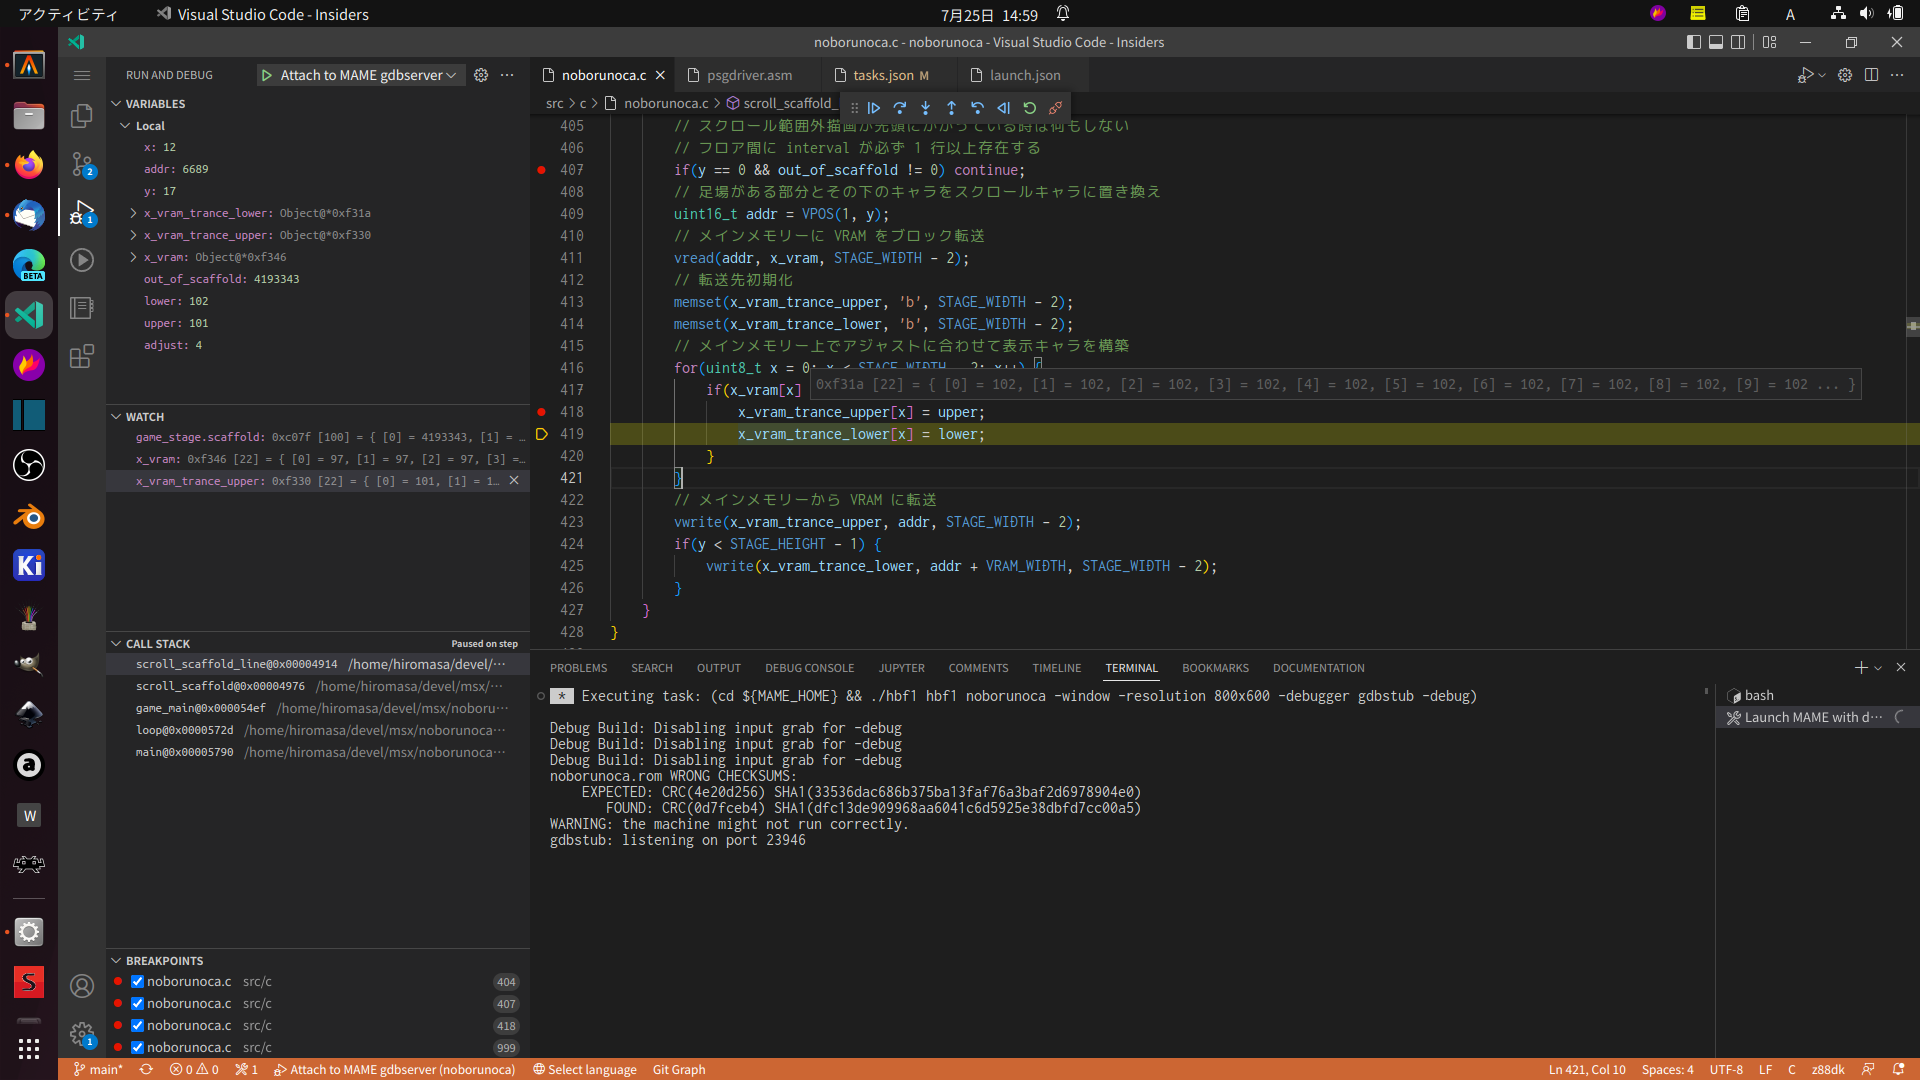
なお、2022/7 現在、Step Over すると動作が戻ってこなくなるようです。Continue と Step into はうまく動作しますので使い分けて活用すると良いと思います。
アセンブラデバッグをする場合
VS Code 上でアセンブラデバッグをする場合は以下の文書を参考にしてください。
DeZog + Z88DK + MAME で MSX アセンブリーをデバッグする手順
この文書は、VS Code の Z80 デバッガーである DeZog 拡張と Z80 ツールチェイン Z88DK、及び MSX エミュレータ・gdb スタブとして MAME を使い、VS Code 上の Z80 アセンブリーをデバッグする手順です。
開発周辺ツール
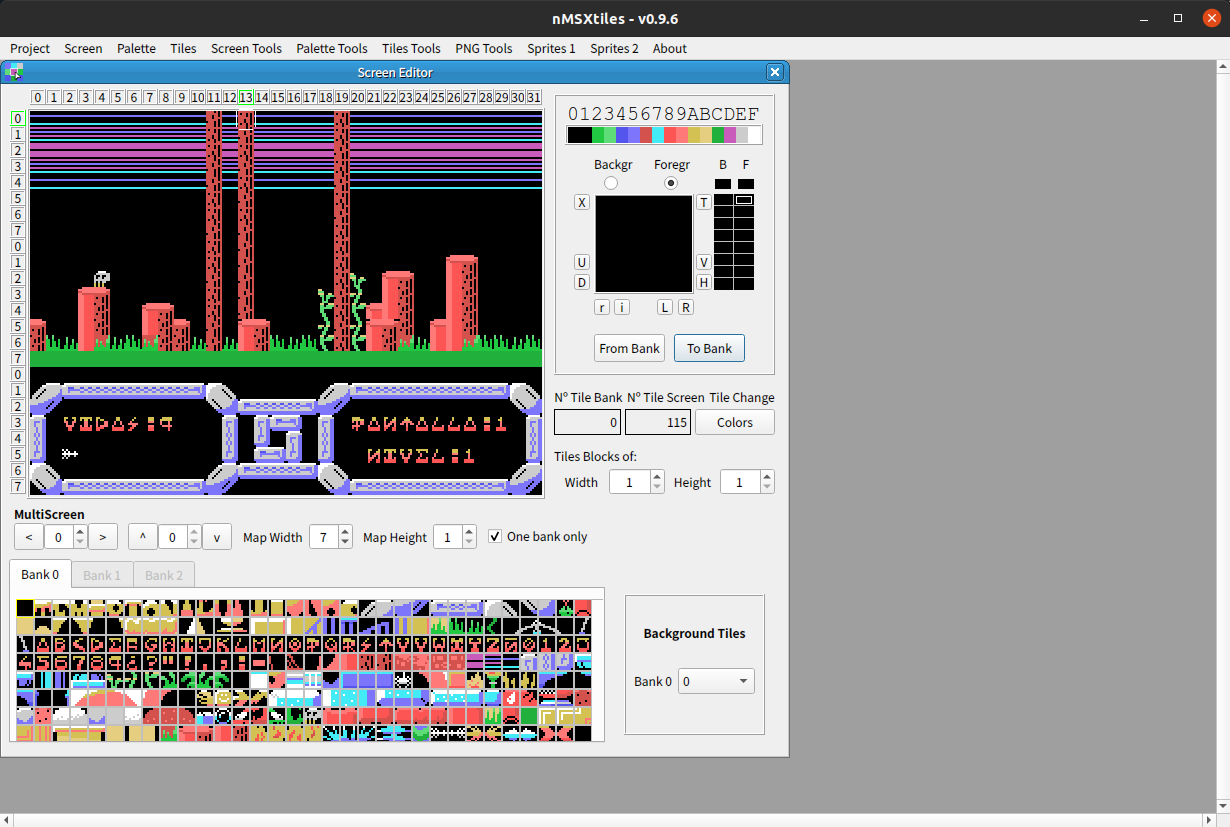
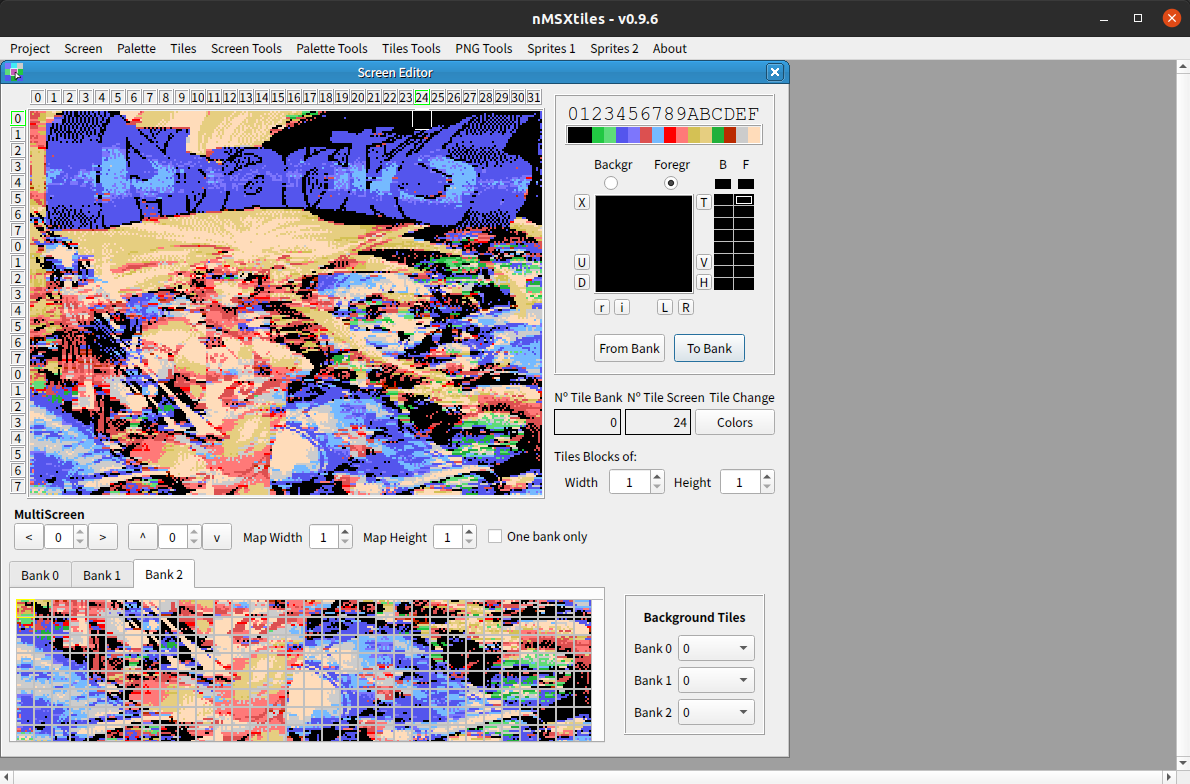
タイルマップエディタ nMSXtiles の導入
MSX 向けのグラフィックを描くため nMSXtiles を導入してみます。(ここでは master ブランチの e4db1b8 版で確認しています)
Editor de Baldosas (Tiles) y Sprites para MSX en modo gáfico SC2 y SC4
依存関係の導入
sudo apt install qtcreator
ソースコードの clone
git clone https://github.com/pipagerardo/nMSXtiles.git
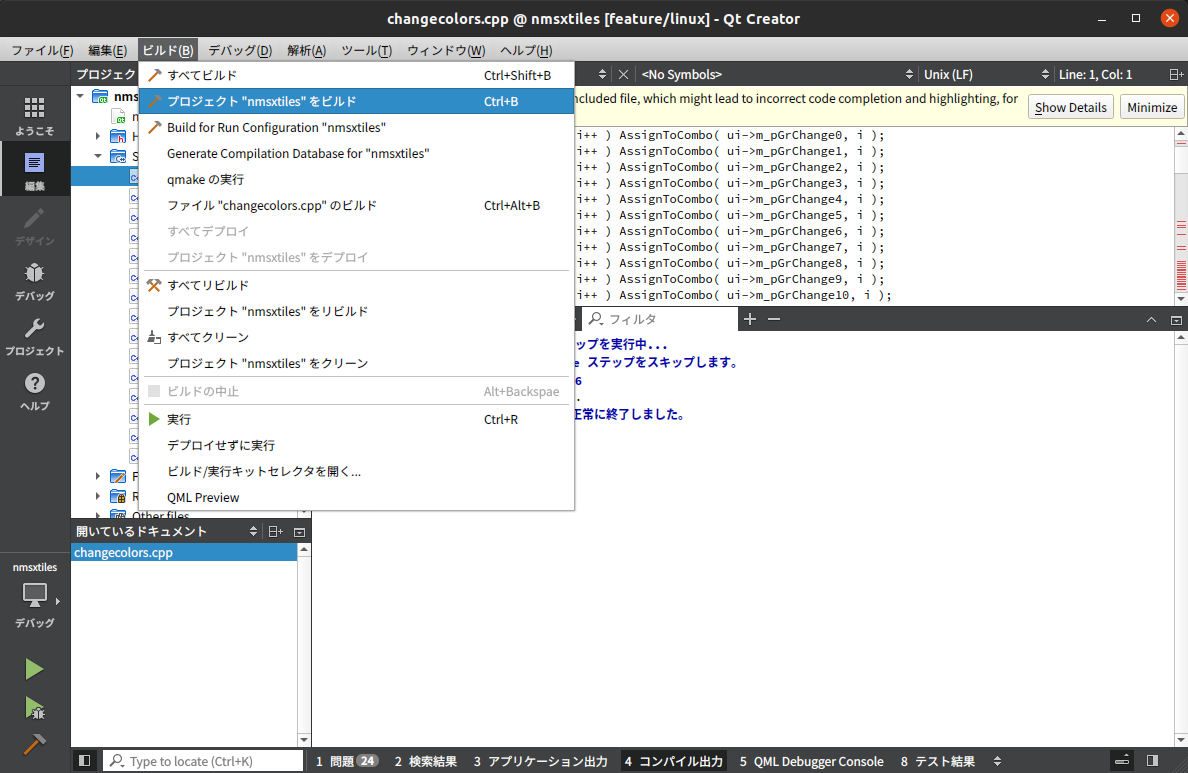
依存関係で導入した Qt Creator を起動して ファイル/プロジェクトを開くから src/nmsxtiles.pro を指定する。
ビルドからプロジェクトのビルドを実行する。
build/ 下に nMSXtiles 実行バイナリが作成されるので、適当なパスの通ったディレクトリにコピーして起動する。
$ ls -laF build/
合計 452
drwxrwxr-x 4 hiromasa hiromasa   4096  9月  9 21:40 ./
drwxrwxr-x 9 hiromasa hiromasa   4096  9月  9 21:40 ../
drwxrwxr-x 2 hiromasa hiromasa   4096  9月  9 21:21 doc/
drwxrwxr-x 2 hiromasa hiromasa   4096  9月  9 21:52 examples/
-rwxrwxr-x 1 hiromasa hiromasa 445792  9月  9 21:40 nMSXtiles*
$ cp -p nMSXtiles ~/.local/bin
$ nMSXtiles
起動して build/examples 下にあるサンプルプロジェクトを開くと使い方が分かります。
Z88DK MSX プログラミング
Z88DK 標準ライブラリー
Z88DK で +msx で MSX をターゲットに指定した場合は C の標準ライブラリーは Classic Library になります。(もうひとつは New Library)
The classic library can be used with both sccz80 and zsdcc and the final binary can be made of object files generated by either compiler (though care will need to be taken around calling conventions and floating point usage).
- C 標準ライブラリーにより
sprintfなどが使える(便利)。
src/example.c
#include <stdio.h>
#include <stdlib.h>

/**
 * スコア等表示
 */
void print_state()
{
    uchar score_string[VRAM_WIDTH + 1];
    sprintf(score_string, "SCORE %06u  HISCORE %06u  %02u", game.score, game.score_hi, game.remein_clear);
    vwrite(score_string, VPOS(0, 0), VRAM_WIDTH);
}
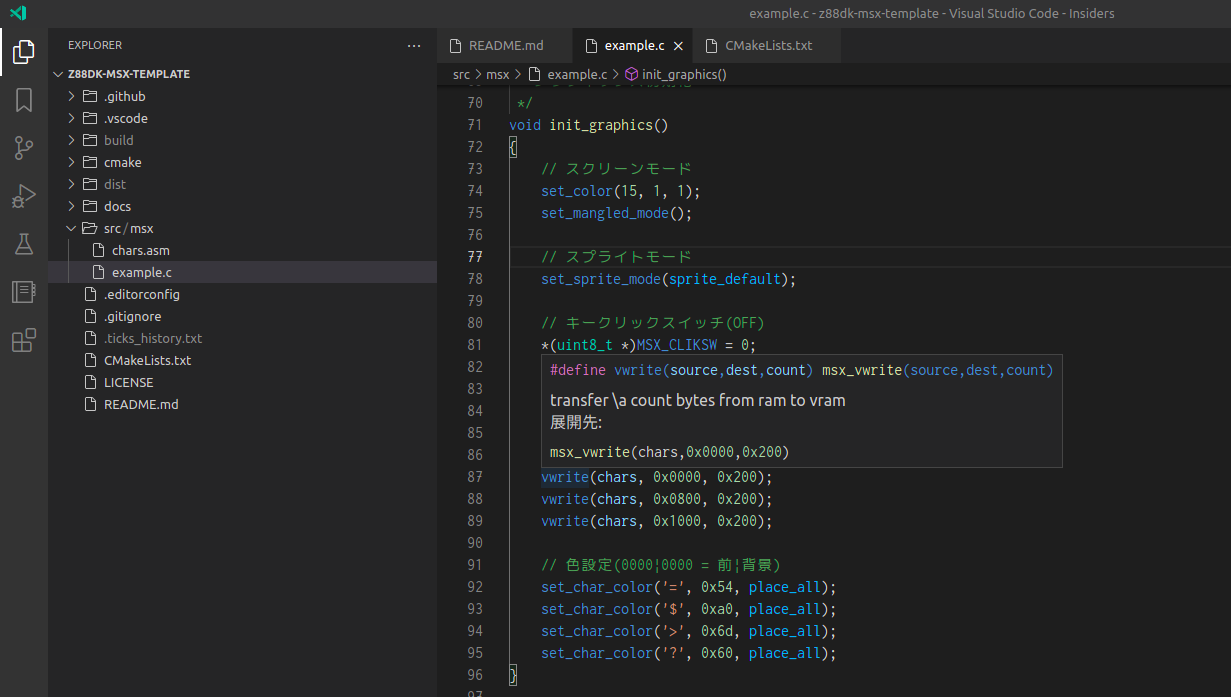
Z88DK gfx ライブラリー
MSX の TMS9918a/TMS9928a VDP にアクセスする場合は msx/gfx.h を include します。
set_colorやset_modeset_mangled_modeなどで VDP の初期化ができる。vwriteやfill、vpeekvpokeなどで VRAM へのアクセスができる。
#include <msx/gfx.h>

/**
 * グラフィックス初期化
 */
void init_graphics()
{
    // スクリーンモード
    set_color(15, 1, 1);
    set_mangled_mode();

    // スプライトモード
    set_sprite_mode(sprite_default);

    // キークリックスイッチ(OFF)
    *(uint8_t *)MSX_CLIKSW = 0;

    // 画面クリア
    fill(VRAM_START, VRAM_NONE, VRAM_WIDTH * VRAM_HEIGHT);

    // PCG 設定(3面に同じデーターを転送)
    vwrite(chars, 0x0000, 0x800);
    vwrite(chars, 0x0800, 0x800);
    vwrite(chars, 0x1000, 0x800);

    // 色設定(0000|0000 = 前|背景)
    set_char_color('=', 0x54, place_all);
    set_char_color('$', 0xa0, place_all);
    set_char_color('>', 0x6d, place_all);
    set_char_color('?', 0x60, place_all);
}
get_rndseed_rnd関数で乱数が使える。
uint8_t x = get_rnd() % 31 + 1;
uint8_t y = get_rnd() % 21 + 1;
get_stickget_triggerでコントローラ、キーボードの入力ができる。
// 入力取得
uint8_t stick = st_dir[get_stick(0)];
uint8_t trigger = get_trigger(0);
ブートストラップ
Z88DK のブートストラップの解説は以下にドキュメントがあります。
The crt is the startup code that runs before calling main(). It is responsible for setting the memory map, instantiating device drivers on stdin/stdout/stderr, initializing the bss and data sections and calling any initialization code prior to calling main(). On return from main() it is responsible for closing open files, resetting the stack and preparing to return to the host.
+msx subtype=rom 指定の場合は、lib/config/msx.cfg より設定され、ブートストラップは次のアセンブラになります。
lib/target/msx/classic/rom.asm
;
;  Main Code Entrance Point
;
IFNDEF CRT_ORG_CODE
    defc  CRT_ORG_CODE  = $4000
ENDIF
    org   CRT_ORG_CODE

; ROM header
    defm    "AB"
    defw    start
    defw    0		;CallSTMT handler
    defw    0		;Device handler
    defw    0		;basic
    defs    6

start:
    di
    INCLUDE "crt/classic/crt_init_sp.asm"
    ei
;...snip...
- 標準で
0x4000からの 16KB ROM。ROM ヘッダーがここでつけられる。 - スタックポインタ初期化。
- プログラムの大きさにより 32KB ROM にも初期化してくれる。(NOBORUNOCA は 32KB ROM)
- コナミのメガロムマッパーなどにも対応されていそう。(未検証)
- RAM は
0xc000から。
.asm をエントリーポイントとしてプログラムを構成する場合は _main を PUBLIC にする。
; code_user is for read-only code
; called by the crt as entry to program
SECTION code_user
; _main という名前でラベルを PUBLIC にする
PUBLIC _main

; メイン
_main:
    ; ここからプログラム
    LD BC,VALUE1
    LD A,(BC)
    LD IX,WORK1
    LD (IX),A
    RET

; rodata_user if for constant data
; kept in rom if program is in rom
SECTION rodata_user
; ROM に書き込むデーター
VALUE1:      DB 10

; bss_user is for zeroed ram variables
; zeroed by crt when program started
SECTION bss_user
; RAM に配置するワークエリア(CRT が 0 に初期化してくれる)
WORK1:       defs 1

; data_user is for initially non-zero ram variables
; initialized in ram by crt if the program is in rom
SECTION data_user
; RAM に配置するデーター(CRT が指定値で初期化してくれるらしい)
WORK2:       DB 10
.asm へのバイナリデータリンク
.asm ファイルにデータセクション rodata_user(ROM に配置される)をつくり、_ アンダーバー付きラベルをパブリック指定することで .c から extern で、アンダーバーなしのラベル名で参照できる。
src/chars.asm
; rodata_user
; https://github.com/z88dk/z88dk/blob/master/doc/overview.md#a-quick-note-for-asm-code
; rodata_user if for constant data
; kept in rom if program is in rom
SECTION rodata_user
PUBLIC _chars, _colors

_chars:
DB $fe,$c2,$8a,$92,$aa,$86,$fe,$00,$fe,$c2,$8a,$92,$aa,$86,$fe,$00
DB $fe,$c2,$8a,$92,$aa,$86,$fe,$00,$fe,$c2,$8a,$92,$aa,$86,$fe,$00
src/example.c
// chars.asm::_chars ラベルのアドレス参照(VRAM PCG 転送用)
extern unsigned char chars[];
ABI を合わせることで .asm と .c 間で関数呼び出しや call が可能。(本サンプルではアセンブラでかかれたサウンドドライバーの呼び出し部分で使用)
The z88dk parameter passing mechanism normally relies on the stack: local variables declared in a C program are allocated on the stack as a function is entered and are popped off the stack as functions are exited. z88dk supports multiple calling conventions so care should be taken when writing assembler that interfaces with C.
.asm でかかれたプログラム領域は SECTION code_user に配置する。.asm の規定セクション名については、以下のドキュメントに記載があります。
Z88DK uses z80asm as a section-aware linking assembler. What this means is placement of code and data in memory is controlled by section assignment rather than ORG. This is an essential feature of a modern development environment.
ABI について(呼び出し規則と関数デコレータ)
本項「呼び出し規則と関数デコレータ」は Z88DK Wiki の DeepL 日本語訳です。
Z88DK には、関数を呼び出すためのいくつかの異なる規約があります。これらを理解することで、プログラムとアセンブラの機能をリンクさせたり、デバッグの際に役立つでしょう。
規約や修飾子は、例えば、関数のプロトタイプにサフィックスとして追加することで、コンパイラに示されます。
int function(long val) __z88dk_callee;
Z88DK は以下の呼び出し規則をサポートしています。
| 修飾子 | Stack cleanup | 説明 |
|---|---|---|
__smallc |
呼出し元 | sccz80 が使用するデフォルトの呼び出し規則です。パラメータは、左から右に向かってスタックに押し込まれます。sccz80 の場合、char は word としてスタックにプッシュされます。注意 zsdcc のバグにより、__smallc 関数にアクセスすると、chars は 1 バイトとしてプッシュされます。戻り値は hl, または dehl です。 |
__stdc |
呼出し元 | パラメータは逆順(右から左)にプッシュされます。char は word としてスタックにプッシュされます。戻り値は hl または dehl です。 |
__z88dk_sdccdecl |
呼出し元 | zsdcc のデフォルトの規約です。パラメータは、右から左に向かってスタックにプッシュされます。char は、1 バイトとしてスタックにプッシュされます。戻り値は、l、hl、または dehl に保持されます。 |
Calling convention modifiers
| 修飾子 | 説明 |
|---|---|
__z88dk_callee |
呼び出された関数(callee)は、スタックをクリーンアップする責任があります。 |
__z88dk_fastcall |
レジスターには最大で1つのパラメータが渡されます。smallc では、一番右のパラメータになります。また、__stdc と __z88dk_sdccdecl では、唯一のパラメータとなります。使用されるレジスタは、パラメータのビット幅に応じて、常に DEHL のサブセットとなります。 sccz80 の浮動小数点/倍精度は 48 ビットなので、少し扱いが異なります。 これらは「一次浮動小数点アキュムレータ」を介して渡されます。 従来の C ライブラリでは、これは "fa"と名付けられた6バイトのスタティックメモリです。 new c library では、これはexxセットのレジスタ BCDEHL です。 sdcc の 64 ビット long long 型は、fastcall リンケージを使用して渡すことができません。 |
__z88dk_saveframe |
sccz80 で生成されたコードにのみ有効です。sdccフレームポインタ(ix)は、この関数への入力時に保存されます。これはこの関数が sdcc コンパイルコードから呼び出されることが予想され、長さまたは浮動小数点を使用する場合に必要です。 |
__critical |
割り込みの状態は、関数への入力時に保存され、終了時に復元されます。 |
__interrupt(n) |
入力時にプライマリ・レジスタとインデックス・レジスタを保存し、終了時にリストアします。必要に応じてreti/retnして返します。z88dk で採用されている動作 はsdccと同じで「かなり紛らわしい」です。 |
__naked |
アセンブラ関数に使用され、関数のプロローグとエピローグが生成されないようにします。 |
__interrupt __critical インタラクション:
void func() __critical __interrupt- レジスタをセーブし、retnで返します(NMIの場合など)void func() __interrupt-eiし、レジスターを保存し、retiで返します (im2 の場合)void func() __critical __interrupt(0)- レジスターを保存し、ei; retiで返します (im1 の場合)
バンクコール規約修飾子
| 修飾子 | 使用方法 |
|---|---|
__banked |
ターゲット固有の banked_call 関数を使用して、関数を呼び出すことができます。呼び出しの後には、その関数の32ビットのアドレスが続きます。最初の2バイトがアドレスで、後の2バイトがバンクです。この呼び出し規則の関数例は、クラシックな +zx、+msx、+gbポートに見られます。 |
__z88dk_shortcall(RR, VV) |
rst RR トランポリンで関数を呼び出すことができます。VV < 256 の場合、生成されるコードは rst RR; defb VV であり、そうでない場合は rst RR; defw VV となります。これは、非ページ化されたメモリバンクにある関数にアクセスするために使用できます。 |
__z88dk_shortcall_hl(RR, VV) * |
生成されたトランポリンが次のようになることを除けば、上記と同じです。: ld hl, VV; rst RR |
__z88dk_hl_call(VV1, VV2) * |
spectranet スタイルトランポリンです。: ld hl, VV1; call VV2 |
__z88dk_params_offset(VV) |
トランポリンを介して呼び出された場合、関数のパラメータがsp+2を起点に配置されていないことがあります。このアノテーションでは、パラメータに到達するために必要な追加のオフセットを定義します。 |
*: __z88dk_fastcall と組み合わせた場合、fastcall に必要なコンテンツや HL は BC にコピーオーバーされ、後に置き換えられます。トランポリンが受信側で処理されたときにHLの内容を復元するのは、ユーザーの責任です。
__z88dk_shortcall() では、直接呼び出しのみがrstトランポリンを使用し、関数ポインタを介した呼び出しは通常通り呼び出します。したがって、ライブラリを配布したり、インターフェイスを提供したりする際には、rst トランポリンを介して呼び出すことができるマッチした関数スタブを提供する必要があります。
その他の修飾子
| 修飾子 | 利用方法 |
|---|---|
__preserves_regs(r1,r2...) |
指定されたレジスタが関数によって保持されることを sdcc に示します。この情報は、sdcc が生成するコードの品質を向上させるために使用されます。 |
sccz80 ライブラリーアノテーション
慣習的に、sccz80が使用するライブラリ関数は、型の後に__LIB__と記されています。
void __LIB__ mylibrary_function(int param);
つまり、sccz80 は mylibrary_function を、sdcc は _mylibrary_function を呼び出すことになります。これらの異なるエントリーポイントは、呼び出し規則を調整するのに役立ちます。(vaargs関数では必須)
戻り値
戻り値は、戻り値のビット幅に応じて、DEHLのサブセットに保持されます。 sccz80 の 48 ビット float/double は、クラシックライブラリではアドレス "fa"の 6 バイトのスタティックメモリである "primary floating point accumulator" に値を返し、new c library では exx セットのレジスタBCDEHL に値を返すなど、扱いが異なります。 なお、DEHL を介して1つのパラメータが関数に渡される fastcall リンケージと同じルールが適用されます。
64-bit long long 型の戻り値は特別に処理されます。 コンパイラは、関数呼び出しの最初のパラメータとして、戻り値のメモリへのポインタを渡します。 このパラメータは、関数のプロトタイプには記載されていません。 呼び出された関数は、そのポインタを使って、返された64ビットの値を格納しなければなりません。
[翻訳ここまで]
インラインアセンブラ
C 言語ソースコード中に #asm #endasm もしくは、__asm __endasm; を挟むことでインラインアセンブラを使うことができます。スタックは __smallc にて、char は word のリトルエンディアンで積まれるので、C言語関数の引数は次のように取得できます。
void write_psg(uint8_t reg, uint8_t dat)
{
#asm
    LD   HL ,2     ;
    ADD  HL, SP    ; リターンアドレスをスキップ
    LD   E, (HL)   ; WRTPSG(E)
    INC  HL        ; WORD の 2byte 目をスキップ
    INC  HL        ;
    LD   A,(HL)    ; WRTPSG(A)
    CALL $0093     ; call WRTPSG(A, E)
#endasm
}

/**
 * 特殊効果音
 */
void sound_jump()
{
    // ..snip..
    // ボリューム設定
    write_psg(0xa, 0x0);
    // ..snip..
}