DeZog + Z88DK + MAME で MSX アセンブリーをデバッグする手順
はじめに
この文書は、VS Code の Z80 デバッガーである DeZog 拡張と Z80 ツールチェイン Z88DK、及び MSX エミュレータ・gdb スタブとして MAME を使い、VS Code 上の Z80 アセンブリーをデバッグする手順です。
Z88DK でつくられた Z80 ソースコードを、DeZog 拡張と MAME リモートデバッグの機能を使い、VS Code 上でパワフルにデバッグをすることが可能です。
本手順は、Ubuntu 22.04 LTS 及び、Windows 10/11 の WSL2(WSLg) な Ubuntu 22.04 LTS で動作確認しています。 未確認ですがおそらく macOS でも同様の方式で動作するはずです。
Windows 10 WSL2 (WSLg) で動作する MAME Linux バイナリと DeZog:
DeZog と MAME のデバッグ接続についての詳細は DeZog の次のドキュメントを参考にしてください。
MAME - Multiple Machine Arcade Emulator
Support for MAME is new and at the moment only experimental. MAME implements a gdbstub that can be accessed from DeZog via a socket. Therefore it is necessary to start MAME (v0.242) with e.g. these options:
Windows WSL2 を使う場合の準備
本手順を Windows で使う場合は、Windows に Windows WSL2 バージョン 1.0 以降(カーネル 5.15 以降)の WSLg の機能が導入されている必要があります。手順を簡略化するため、Linux 版の Z88DK ツールチェインと、MAME (WSLg による起動) を活用する方式を採用しているためです。
お使いの Windows が、Windows 11 ではなく 10 の場合は最新アップデートまで適用し WSLg 対応の WSL2 の導入を行ってください。(この記事では Windows 10 22H2 で確認しています)
また、WSL2 で起動する Linux ディストリビューションは Ubuntu 22.04 LTS を指定します。導入後、次の設定値になれば準備完了です。(なお、WSL2 1.0 にアップデート前のバージョンでは wsl --version コマンドが存在しません)
> wsl --update
> wsl --version
WSL バージョン 1.0.1.0
カーネルバージョン: 5.15.74.2
WSLg バージョン: 1.0.47
> wsl -l
Linux 用 Windows サブシステム ディストリビューション:
Ubuntu-22.04 (規定)
$ uname -a
Linux hostname 5.15.74.2-microsoft-standerd-WSL2
VS Code と拡張の導入
Visual Studio Code(VS Code)をインストール後、拡張を導入してください。
- Visual Studio Code - 1.75 以降の最新版にアップデートしてください。
- DeZog 3.1.2 以降 - Z80 デバッガー(導入後 3.1.2 以降が入っていることを確認します)
- ASM Code Lens - Z80 エディタ・ランゲージサーバ
- WSL Remote - Windows の場合のみ導入。WSL2 と Windows 側の VS Code を接続します、
Ubuntu 22.04 に必要な依存を導入
Ubuntu 22.04 LTS を(Windows の場合は WSL2 で)起動し、次のように依存を導入してください。
sudo apt update
sudo apt upgrade
sudo apt install git build-essential cmake
sudo apt install zip wget
また、任意の作業ディレクトリを作成します。この手順では ~/devel/msx とします。
mkdir -p ~/devel/msx
Z88DK のビルド
DeZog 3.1.2 以降は、Z88DK v2.2 がアセンブル時に出力する .lis 及び .map ファイルの解析に対応しています。.map と .lis ファイルは、ソースコードとアセンブリのアドレスをソースマップするために必要なファイルです。
DeZog 3.1 は Z88DK v2.2 の .lis は処理できないため、Z88DK v2.2 より先の開発版をビルドして導入します。
Z88DK の依存の導入:
sudo apt install ragel re2c dos2unix texinfo texi2html gdb curl cpanminus ccache libboost-all-dev libmodern-perl-perl libyaml-perl liblocal-lib-perl libcapture-tiny-perl libpath-tiny-perl libtest-differences-perl libtext-table-perl libdata-hexdump-perl libregexp-common-perl libclone-perl
sudo apt install libxml2-dev
sudo apt install cpanminus
cpanm App::Prove Capture::Tiny::Extended CPU::Z80::Assembler Data::HexDump File::Path List::Uniq Modern::Perl Object::Tiny::RW Test::Cmd Test::Cmd::Common Test::Harness Test::HexDifferences Text::Table YAML::Tiny
Z88DK のビルド:
cd ~/devel/msx
git clone --recursive https://github.com/z88dk/z88dk.git
cd z88dk
git checkout 9ffe204 # v2.2 を指定
eval $(perl -I ~/perl5/lib/perl5/ -Mlocal::lib)
./build.sh -p msx
Z88DK ビルドの確認:
$ ls -laF bin/
-rwxr-xr-x  1 hiromasa hiromasa 3464608 12月 11 00:11 z80asm*
-rwxr-xr-x  1 hiromasa hiromasa 1381704 12月 11 00:10 z88dk-appmake*
-rwxr-xr-x  1 hiromasa hiromasa   15660 12月 11 00:11 z88dk-asmpp*
-rwxr-xr-x  1 hiromasa hiromasa    6789 12月 11 00:11 z88dk-asmstyle*
-rwxr-xr-x  1 hiromasa hiromasa  261280 12月 11 00:11 z88dk-basck*
-rwxr-xr-x  1 hiromasa hiromasa  185112 12月 11 00:10 z88dk-copt*
-rwxr-xr-x  1 hiromasa hiromasa  444768 12月 11 00:11 z88dk-dis*
-rwxr-xr-x  1 hiromasa hiromasa   28128 12月 11 00:11 z88dk-dzx0*
-rwxr-xr-x  1 hiromasa hiromasa   17192 12月 11 00:11 z88dk-dzx7*
-rwxr-xr-x  1 hiromasa hiromasa   35016 12月 11 00:11 z88dk-font2pv1000*
-rwxr-xr-x  1 hiromasa hiromasa 1062600 12月 11 00:11 z88dk-gdb*
-rwxr-xr-x  1 hiromasa hiromasa   47264 12月 11 00:11 z88dk-lib*
-rwxr-xr-x  1 hiromasa hiromasa  841512 12月 11 00:10 z88dk-sccz80*
-rwxr-xr-x  1 hiromasa hiromasa 1133128 12月 11 00:11 z88dk-ticks*
-rwxr-xr-x  1 hiromasa hiromasa  311632 12月 11 00:10 z88dk-ucpp*
-rwxr-xr-x  1 hiromasa hiromasa 3464608 12月 11 00:11 z88dk-z80asm*
-rwxr-xr-x  1 hiromasa hiromasa  337864 12月 11 00:11 z88dk-z80nm*
-rwxr-xr-x  1 hiromasa hiromasa  101464 12月 11 00:11 z88dk-z80svg*
-rwxr-xr-x  1 hiromasa hiromasa  121312 12月 11 00:10 z88dk-zcpp*
-rwxr-xr-x  1 hiromasa hiromasa  385392 12月 11 00:11 z88dk-zobjcopy*
-rwxr-xr-x  1 hiromasa hiromasa   45552 12月 11 00:11 z88dk-zpragma*
-rwxr-xr-x  1 hiromasa hiromasa   48304 12月 11 00:11 z88dk-zx0*
-rwxr-xr-x  1 hiromasa hiromasa   21456 12月 11 00:11 z88dk-zx7*
-rwxr-xr-x  1 hiromasa hiromasa  348488 12月 11 00:11 zcc*
.bashrc に次のように環境変数を設定: /home/hiromasa は適宜修正のこと
$ vi ~/.bashrc
# z88dk
export Z88DK_HOME=/home/hiromasa/devel/msx/z88dk
export ZCCCFG=${Z88DK_HOME}/lib/config
export PATH=${Z88DK_HOME}/bin:${PATH}
いったんシェルを再起動するなどして環境変数を反映させ、次のように Z88DK が正常起動することを確認します。
$ zcc +msx
zcc - Frontend for the z88dk Cross-C Compiler - v18620-0d06c1f9f-20210915
Usage: zcc +[target] {options} {files}
MSX プロジェクトへの MAME の導入と DeZog の設定
MSX プロジェクト内に MAME を導入し、VS Code DeZog 拡張の設定を行います。
この手順では @aburi6800 さんのオールアセンブラ MSX ゲームプロジェクトである、msx-CorridorRunner を使わせていただいてデバッグを構成しています。
https://github.com/aburi6800/msx-CorridorRunner
Corridor Runner for MSX
手順がうまくいきましたら、本設定や Corridor Runner のビルドを参考に適宜アレンジして、みなさんのプロジェクトに導入してみてください。
最初に、Ubuntu 22.04 で MAME を起動するために次の依存を導入します。
sudo apt install libfontconfig-dev
sudo apt-get install libsdl2-dev libsdl2-ttf-dev libasound2-dev libxinerama-dev libxi-dev qtbase5-dev qtbase5-dev-tools
次にデバッグ対象のソースコードとして Corridor Runner を clone します。
cd ~/devel/msx
git clone https://github.com/aburi6800/msx-CorridorRunner
cd msx-CorridorRunner
Corridor Runner を Z88DK でアセンブルします。
mkdir build && cd build
cmake -DCMAKE_TOOLCHAIN_FILE=../cmake/z88dk.cmake ..
make
dist 内に .rom と .map ができていることを確認します。
$ cd ..
$ ls -laF dist/
-rw-rw-r--  1 hiromasa hiromasa  85971 12月 10 20:01 c-runner.lis
-rw-rw-r--  1 hiromasa hiromasa 150748 12月 10 20:01 c-runner.map
-rw-rw-r--  1 hiromasa hiromasa  32768 12月 10 20:01 c-runner.rom
-rw-rw-r--  1 hiromasa hiromasa   9422 12月 10 20:01 c-runner.sym
-rw-rw-r--  1 hiromasa hiromasa   1834 12月 10 20:01 c-runner_BSS.bin
-rw-rw-r--  1 hiromasa hiromasa      3 12月 10 20:01 c-runner_DATA.bin
また、src/msx 内に .lis ができていることを確認します。
$ ls -laF src/msx/*.lis
-rw-rw-r-- 1 hiromasa hiromasa 594996 12月 10 20:01 src/msx/main.asm.lis
-rw-rw-r-- 1 hiromasa hiromasa  78449 12月 10 20:01 src/msx/psgdriver.asm.lis
なお、.lis ファイルは次のような形式になります。 なお、Z88DK v2.3(dev) で相対アドレスが 6桁から4桁に変更になっています。 Z88DK v2.2 の 6桁の場合は DeZog が処理できませんので、最新の開発版の Z88DK を使ってください。
    30  0000  3e00              	LD A,1
    31  0002  320000            	LD (VSYNC_WAIT_CNT),A
    32
    33                              ; ■ゲーム処理呼び出し
    34  0005  cd0000                CALL GAME
    35
    36                          VSYNC_WAIT:
    37                          	; ■垂直帰線待ち
    38  0008  3a0000            	LD A,(VSYNC_WAIT_CNT)
    39  000b  b7                	OR A
    40  000c  c20000            	JP NZ,VSYNC_WAIT
    41
    42  000f  c30000            	JP MAINLOOP
次にプロジェクトに MAME を導入します。
Ubuntu 22.04 LTS (WSL2 WSLg 含む)用にビルドした MAME バイナリーを含むアーカイブ(mame-cbios-rev250.tar.gz)を準備しました。これは MSX 互換 BIOS である C-BIOS が利用可能になった(実機の ROM が不要な)スペシャルビルドの MAME です。(macOS の方は同梱のバイナリは動作しませんので、後述のパッチを適用した MAME をビルドして差し替えてください)
カレントディレクトリが Corridor Runner であることを確認:
$ pwd
~/devel/msx/msx-CorridorRunner
MAME バイナリーを導入:
# add .gitinogre
echo "mics/" >> .gitignore
# MAME バイナリ取得展開
wget https://maple4estry.netlify.app/files/mame-cbios-rev250.tar.gz
tar zxvf mame-cbios-rev250.tar.gz
rm mame-cbios-rev250.tar.gz
$ ls -laF mics/mame
drwxrwxr-x 7 hiromasa hiromasa     4096 11月 23 18:25 ./
drwxrwxr-x 3 hiromasa hiromasa     4096 11月  2 17:20 ../
drwxrwxr-x 2 hiromasa hiromasa     4096 11月 23 18:25 cfg/
drwxrwxr-x 2 hiromasa hiromasa     4096 11月 23 18:25 hash/
drwxrwxr-x 2 hiromasa hiromasa     4096 11月 23 18:25 ini/
-rwxrwxr-x 1 hiromasa hiromasa 72672584 12月 10 19:21 mame*
drwxrwxr-x 2 hiromasa hiromasa     4096 12月 10 20:30 nvram/
drwxrwxr-x 3 hiromasa hiromasa     4096 12月 10 20:20 roms/
次に VS Code を起動します。
なお、Windows WSL2 環境下でも Ubuntu 上の code . コマンドにより、事前に Windows 側の VS Code に導入した WSL Remote 拡張の機能から、外側は Windows、中身は Linux という状態で VS Code が起動します。(初回起動時のみ VS Code バックエンドのダウンロードがかかるのと、拡張の再導入がかかるため若干時間がかかります)
code .
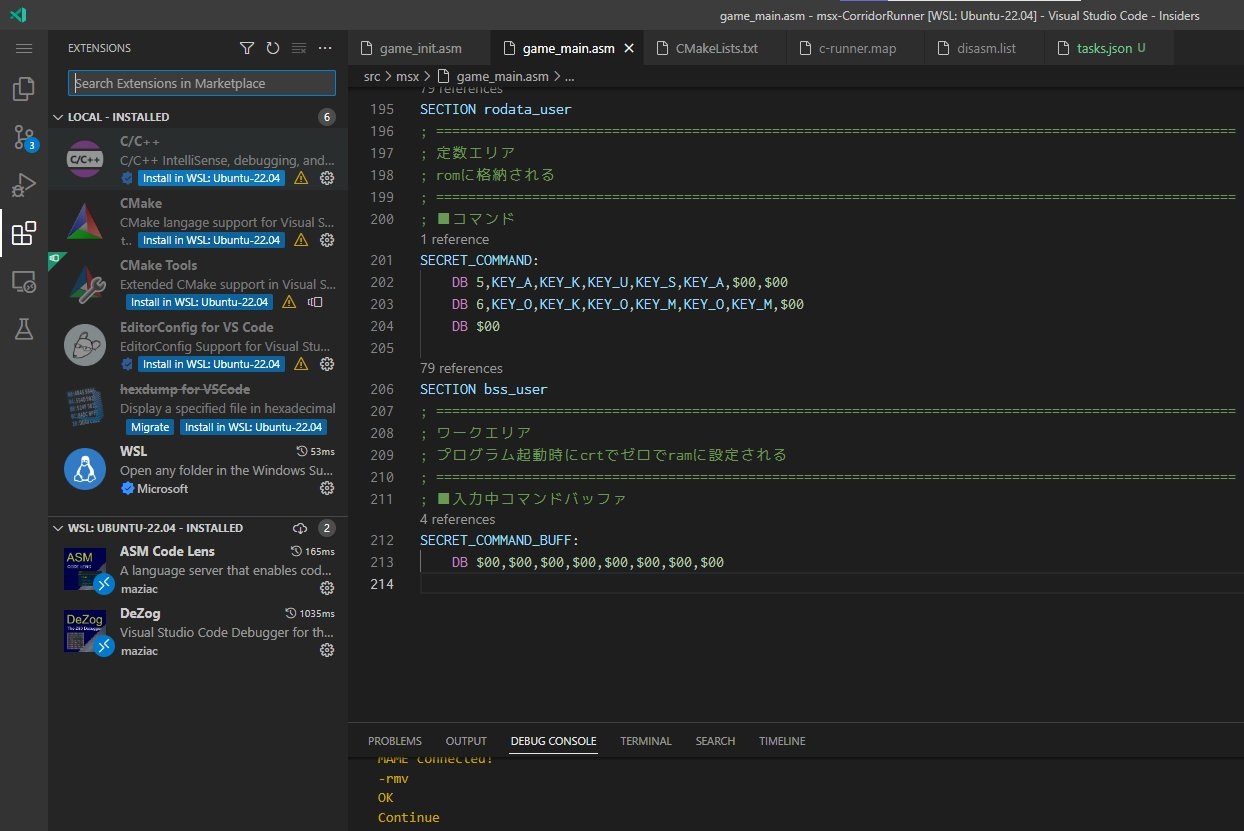
また、Windows WSL2 の場合は、VS Code 起動後に拡張パネルから DeZog と ASM Code Lens を Ubuntu 側でも有効にしてください。(画面左下、WSL: Ubuntu-22.04 - INSTALLED に拡張が入ること)
VS Code が起動したら、.vscode/ ディレクトリ配下に次の DeZog 用のコンフィグファイルと、ビルドタスク定義を追加します。 (.vscode/tasks.json 内のコマンドパスを、導入した MAME のパスと一致させてコントロールしています)
.vscode/tasks.json : ビルド及び MAME 起動タスク
{
  // See https://go.microsoft.com/fwlink/?LinkId=733558
  // for the documentation about the tasks.json format
  "version": "2.0.0",
  "tasks": [
    {
        "label": "Run CMake",
        "type": "shell",
        "dependsOn": "Clean CMake directory",
        "linux": {
            "command": "(cd ${workspaceFolder}/build && cmake -DCMAKE_TOOLCHAIN_FILE=${workspaceFolder}/cmake/z88dk.cmake ..)"
        }
    },
    {
        "label": "Make Compile",
        "type": "shell",
        "linux": {
            "command": "(cd ${workspaceFolder}/build && make clean && make)"
        }
    },
    {
      "label": "MAME Launch",
      "type": "shell",
      "dependsOn":[
        "Deploy to MAME"
      ],
      "linux": {
          "command": "(cd ${workspaceFolder}/mics/mame && ./mame cbiosm1jp crunner)"
      }
    },
    {
      "label": "MAME Launch with debugger",
      "type": "shell",
      "dependsOn":[
        "Deploy to MAME"
      ],
      "linux": {
          "command": "(cd ${workspaceFolder}/mics/mame && ./mame cbiosm1jp crunner -debugger gdbstub -debug)"
      }
    },
    {
      "label": "Deploy to MAME",
      "dependsOn":[
        "Make Compile"
      ],
      "type": "shell",
      "linux": {
          "command": "(cd dist/ && rm -f ${workspaceFolder}/mics/mame/roms/msx1_cart/crunner.zip && zip -j ${workspaceFolder}/mics/mame/roms/msx1_cart/crunner.zip c-runner.rom)"
      }
    },
    {
      "label": "CMake Clean directory",
      "type": "shell",
      "linux": {
          "command": "rm -Rf ${workspaceFolder}/build && mkdir ${workspaceFolder}/build"
      }
    }
  ]
}
なお、macOS の場合、ビルドタスク内の command 内に複数のコマンドを記述した場合に引数がうまく渡らない事象がでるとの情報をいただきました。ツイートを参考にさせていただき、それぞれをシェルに外だしするとよいと思います。
.vscode/launch.json : デバッガー起動用設定
{
  // IntelliSense を使用して利用可能な属性を学べます。
  // 既存の属性の説明をホバーして表示します。
  // 詳細情報は次を確認してください: https://go.microsoft.com/fwlink/?linkid=830387
  "version": "0.2.0",
  "configurations": [
    {
      "type": "dezog",
      "request": "launch",
      "name": "DeZog",
      "remoteType": "mame",
      "mame": {
        "port": 23946
      },
      "z88dkv2": [ // Z88DK 2.3(dev) and DeZog 3.1 or higher
        {
          "path": "src/msx/main.asm.lis",
          "mapFile": "dist/c-runner.map",
          "srcDirs": [
            ""
          ] // Sources mode
        },
        {
          "path": "src/msx/psgdriver.asm.lis",
          "mapFile": "dist/c-runner.map",
          "srcDirs": [
            ""
          ] // Sources mode
        }
      ],
      "rootFolder": "${workspaceFolder}",
      "commandsAfterLaunch": [
        "-rmv",
        // "-mv 0xc000 0x100"
      ]
    }
  ]
}
MAME によるプロジェクト実行とデバッグ
dist に出力されている .rom を MAME 形式(mics/mame/roms/msx1_cart/crunner.zip)にして、MAME から起動する VS Code タスク(.vscode/tasks.json)を、次の操作で実行します。
- F1 キー | Tasks: Run Task: | MAME Launch
Corridor Runner が起動することを確認します。通常のコーディングサイクルでは、このタスクで開発を進めると便利でしょう。
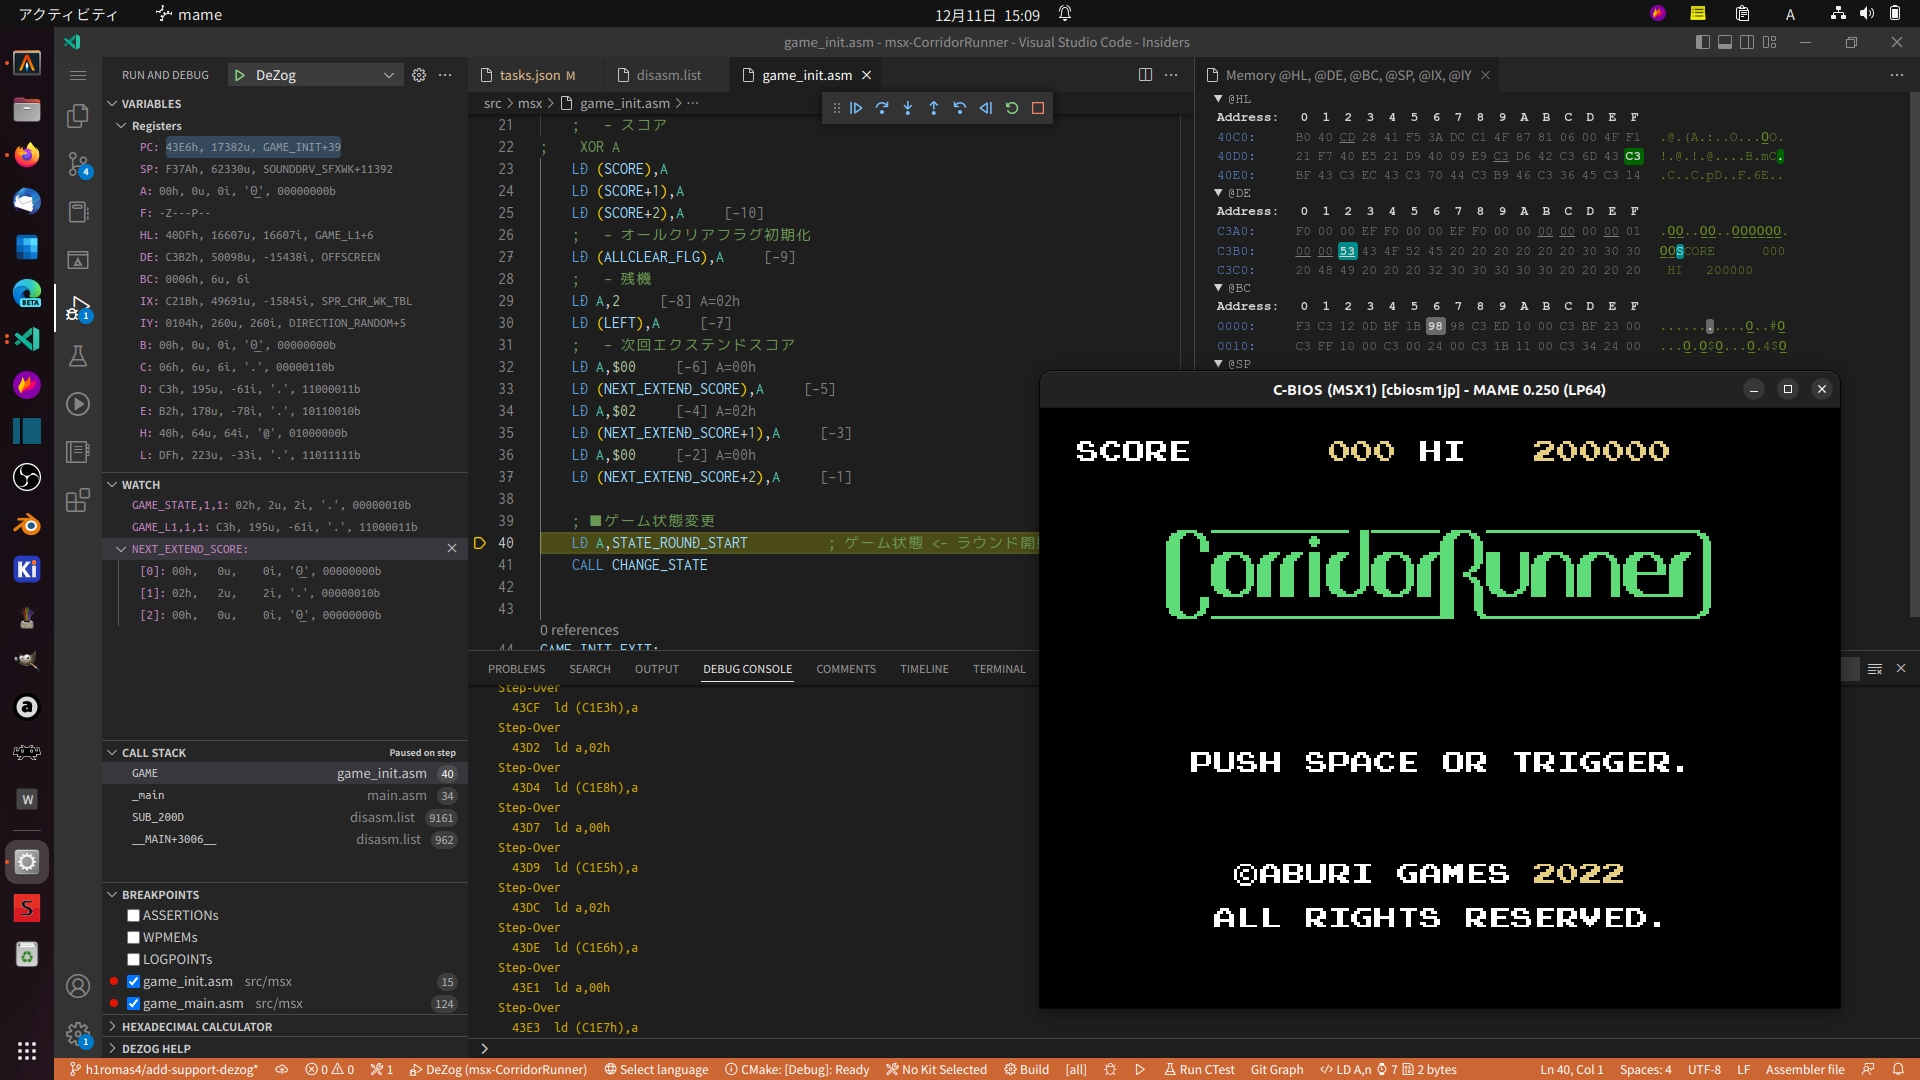
次に起動した MAME をいったん停止し、いよいよデバッグ実行をしてみます。
- F1 キー | Tasks: Run Task: | MAME Launch with Debugger
- VS Code Debug パネルから「DeZog」を実行。
最初の 1. の操作でリモートデバッグ待ち状態の黒い画面の MAME を起動し、VS Code Debug DeZog から MAME にコネクションが接続されるとプロジェクトのデバッグ実行が開始されるはずです。
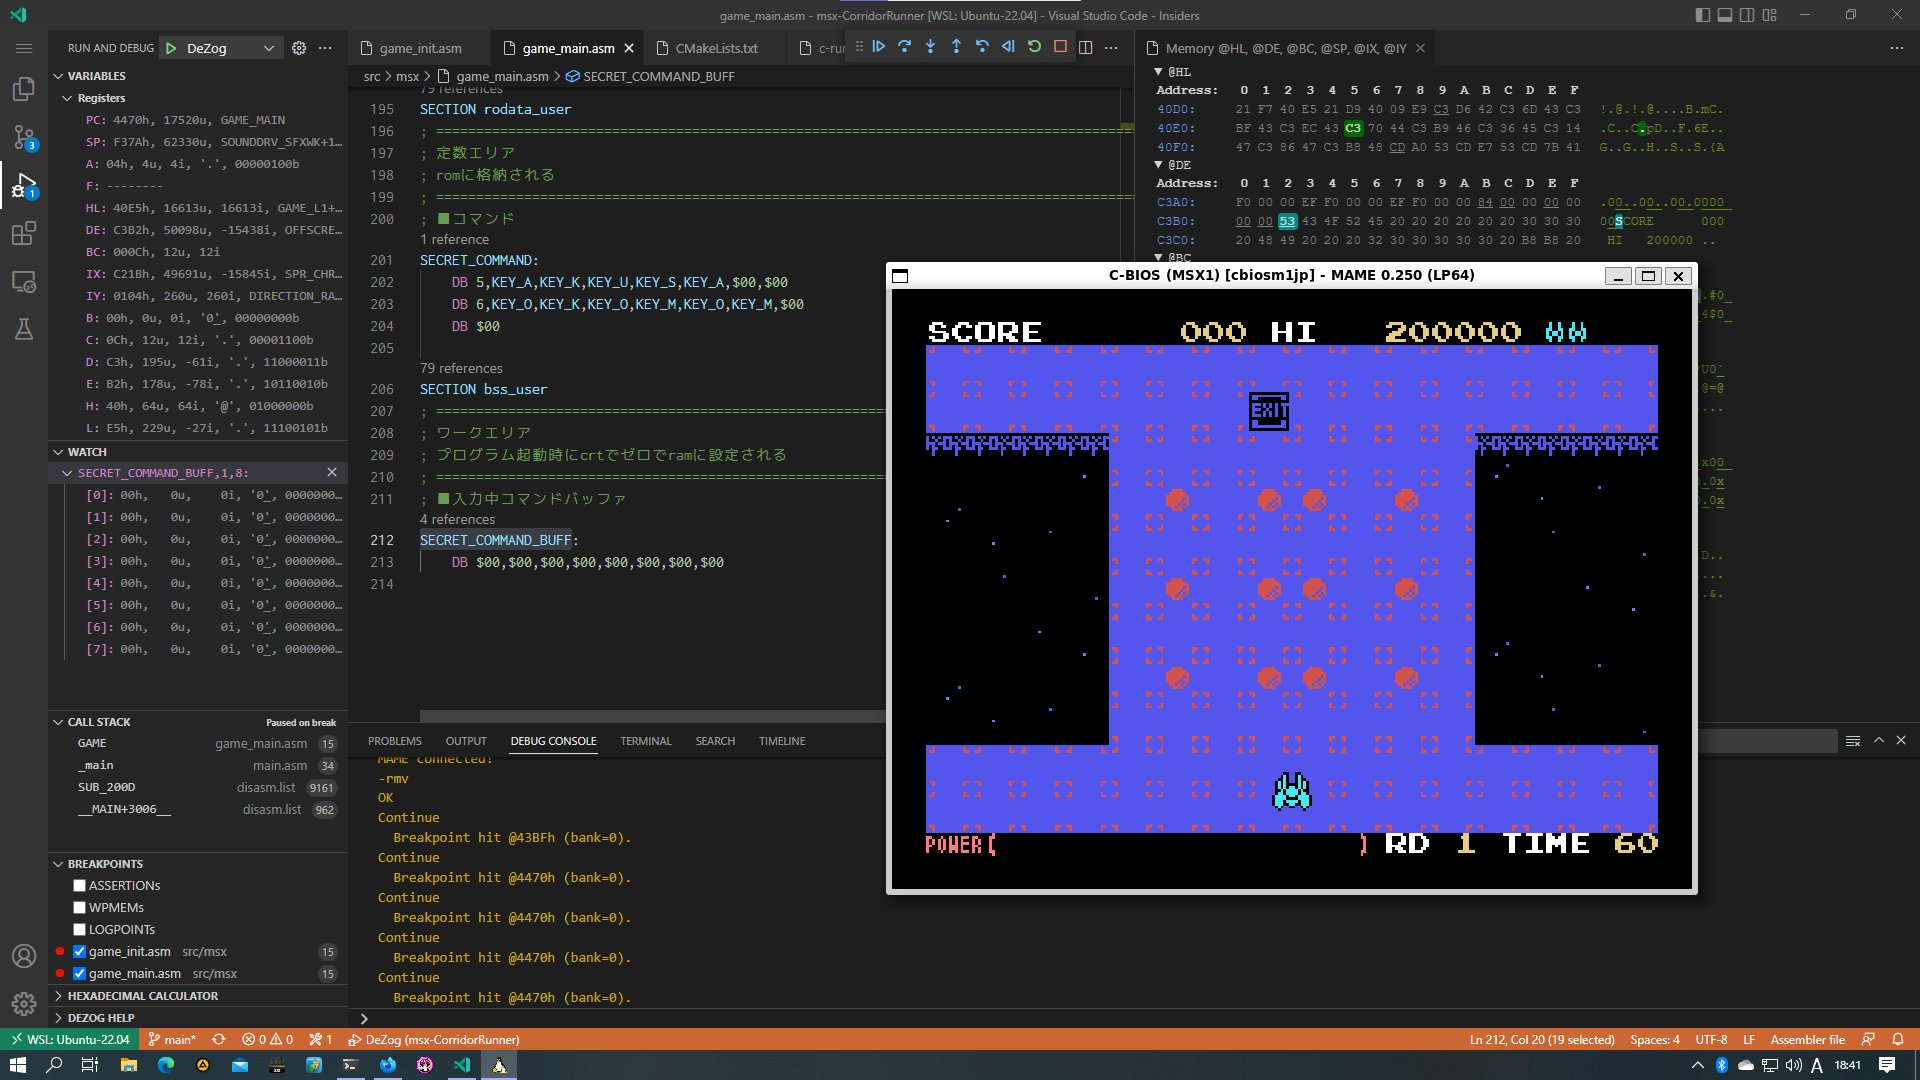
DeZog の使い方
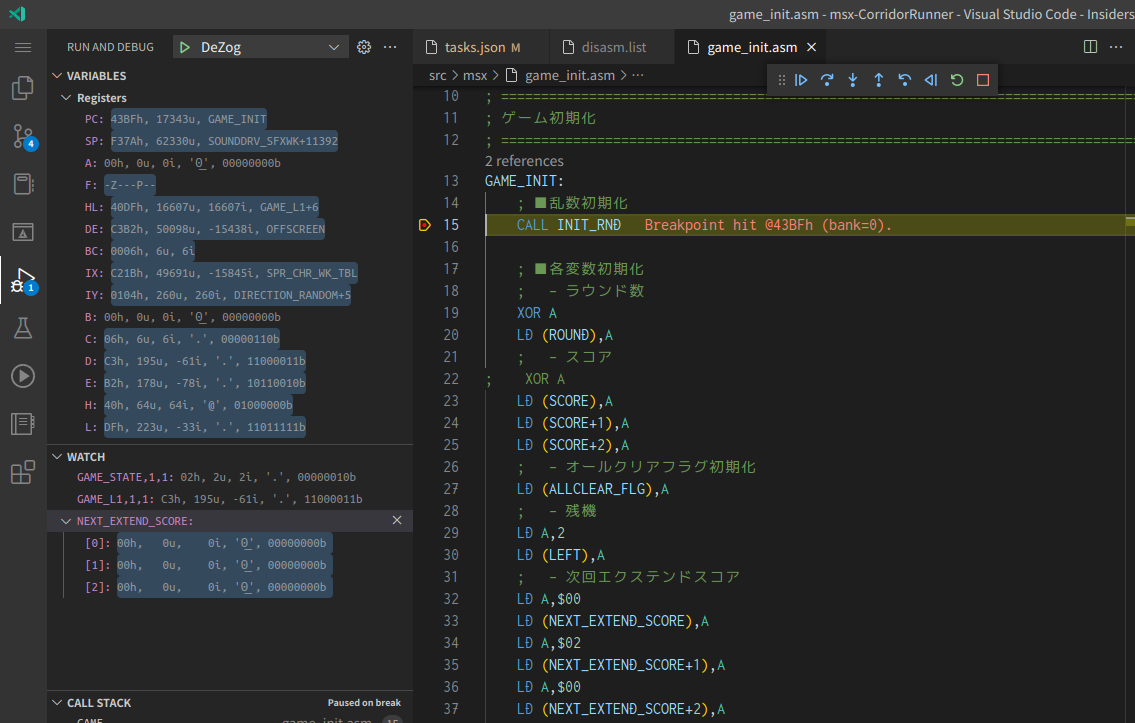
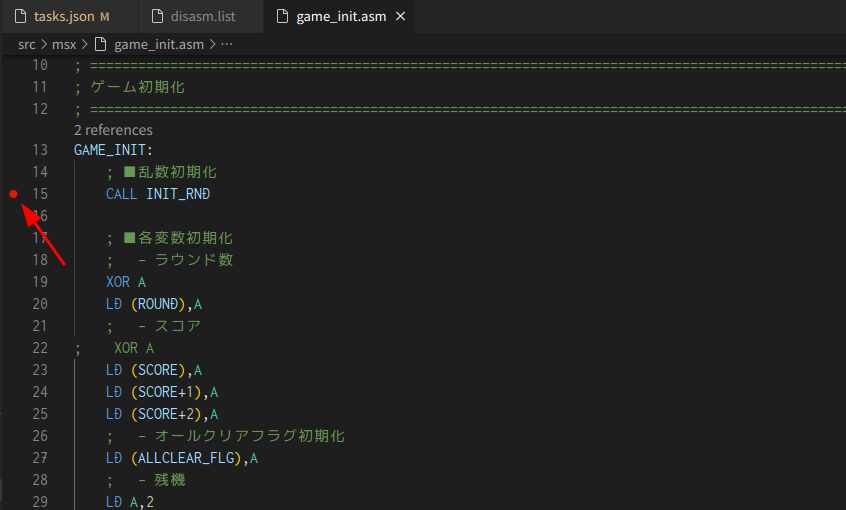
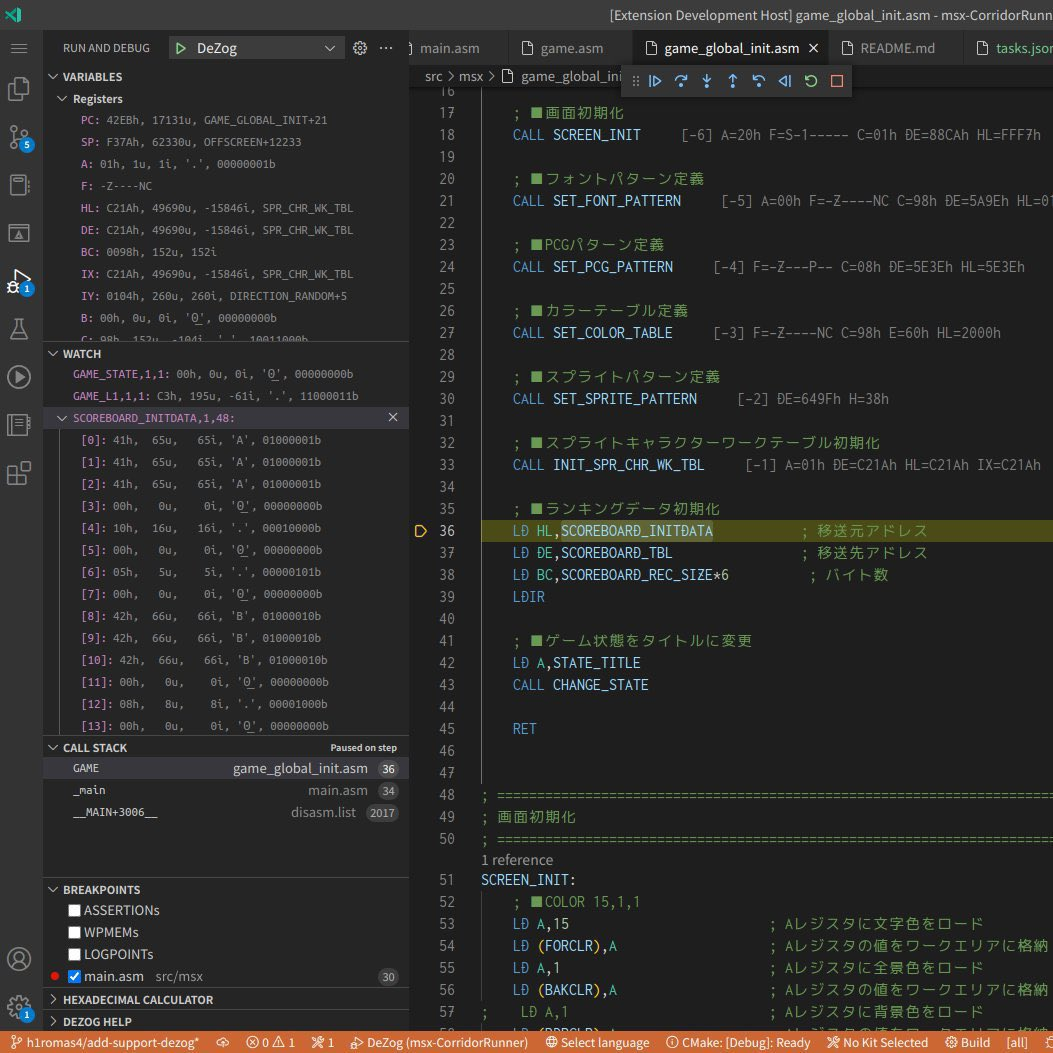
ソースコードへのブレイクポイントの設定:
ウォッチ: レジスタや、ラベル, 桁数, 長さ 形式で指定可能
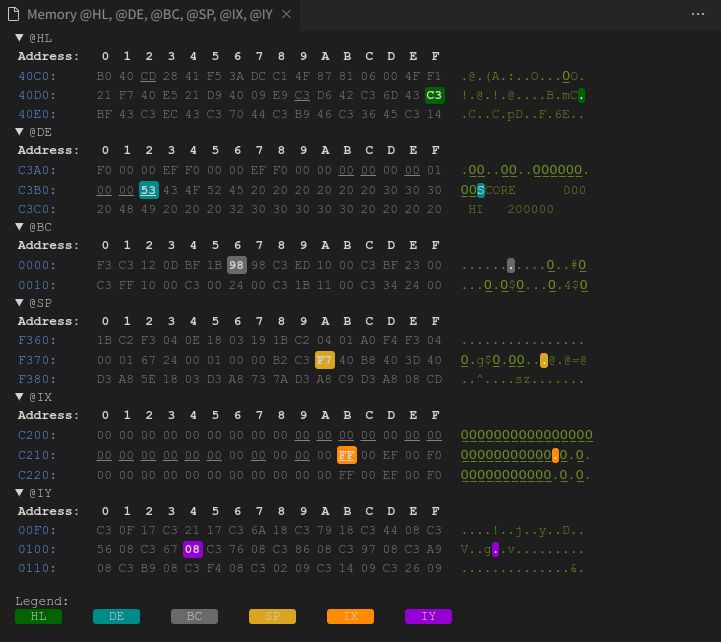
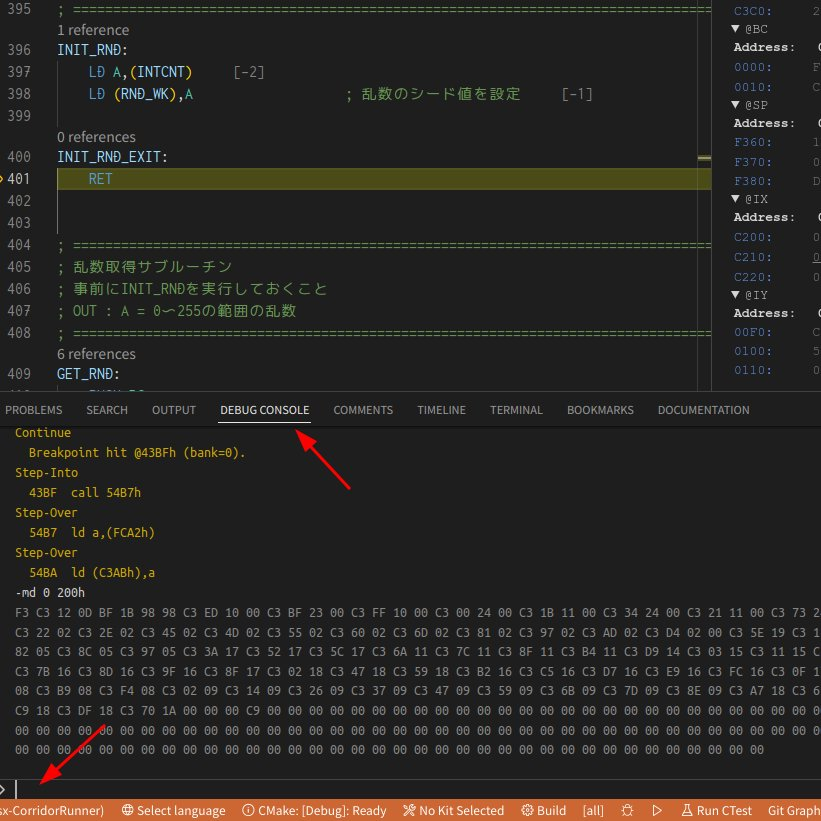
レジスター間接参照:
ログメッセージ: ブレイクポイントの編集から、printf デバッグ可能
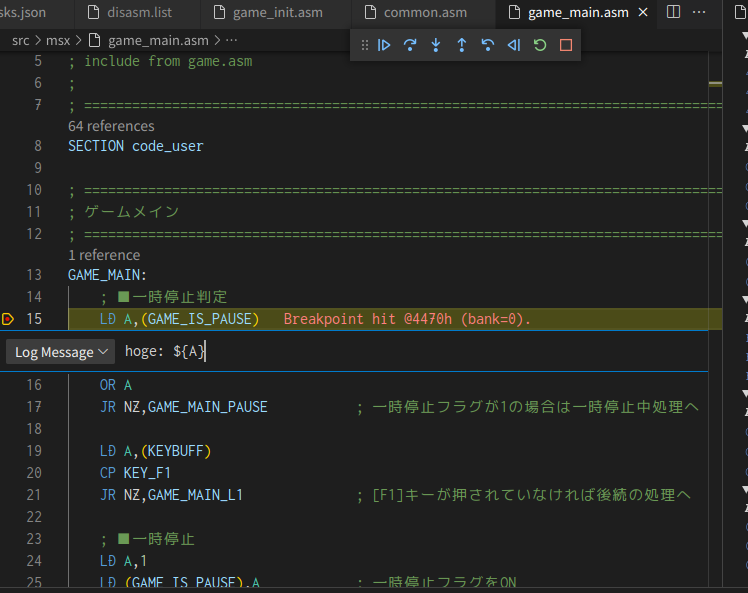
デバッグコンソール・コマンド: 上記のメッセージ出力先。また DeZog デバッグコマンドを実行できる。
その他にも多くの機能がありますので、DeZog のマニュアルを参考にしてください。
Usage of DeZog - the VS Code Z80 Debugger
This document describes the features of DeZog and how they can be used.
Reverse Engineering with DeZog
Since version 3.0 DeZog can also be used for reverse engineering of existing SW.
ノート: MAME の C-BIOS 対応パッチビルド
C-BIOS 対応の MAME をビルドする場合は、以下のようにします。
macOS の場合
macOS の場合の依存関係の導入は次の MAME の公式ドキュメントが参考になります。 xcode(clang) の導入と SDL2 ライブラリーを導入すれば OK と思います。
https://docs.mamedev.org/initialsetup/compilingmame.html#apple-macos
You’ll need a few prerequisites to get started. Make sure you’re on OS X 10.14 Mojave or later for Intel Macs or macOS 11.0 Big Sur for Apple Silicon. You will need SDL2 2.0.6 or later for Intel or SDL2 2.0.14 on Apple Silicon. You’ll also need to install Python 3 – it’s currently included with the Xcode command line tools, but you can also install a stand-alone version or get it via the Homebrew package manager.
ビルド手順
MAME を git clone: (この記事では df20290ed56e2c87504ed3a9ede681c0707e3230 で動作確認)
git clone https://github.com/mamedev/mame.git
cd mame
# git checkout df20290ed56e2c87504ed3a9ede681c0707e3230
C-BIOS 対応パッチを適用: (-j4 指定は CPU コアを 4つ使用してビルド。機械の性能に合わせて設定するとビルドが速くなります)
wget https://gist.githubusercontent.com/h1romas4/dff99741f6b2ea8a4badb2092180cf07/raw/7a934fd8f6fd7893a1cb9b5f18d601918c428214/add-support-msx-cbios.patch
patch -p1 < add-support-msx-cbios.patch
make -j4 SOURCES=src/mame/msx/msx1.cpp,src/mame/msx/msx2.cpp
実行ファイル生成確認:
$ ls -laF mame
-rwxrwxr-x 1 hiromasa hiromasa 72672584 12月 10 19:21 mame*
起動確認: (C-BIOS の ROM を配置していないためいったん次のように起動エラーになればOK)
$ ./mame cbiosm1jp -window
cbios_main_msx1_jp.rom NOT FOUND (tried in cbiosm1jp)
cbios_logo_msx1.rom NOT FOUND (tried in cbiosm1jp)
cbios_sub.rom NOT FOUND (tried in cbiosm1jp)
Fatal error: Required files are missing, the machine cannot be run.
mame-cbios-rev250.tar.gz アーカイブの mame バイナリーとビルドした mame を差し替えます。